Cricut is a godsend for artists and people who like to kick it up a notch with their crafts. People have such incredible work to showcase and Cricut helps them do that. For today, we are bringing another exciting technique that you can do while using Cricut and that is making stunning banners with this cutting machine. This is going to be a pretty easy method for you but only if you follow the steps that we’ve mentioned properly. Follow our steps correctly and you’ll end up with a lovely banner of yours in no time.
We shall start talking about the steps that will help you get done with your banner on Cricut.
One thing you will need to do before you start making the banner is search for Free SVG Banner Templates. You can find several links online which like you to these templates and make sure to use these templates for your personal use only. Do not upload them to other blogs or social media websites.
Steps on Make Stunning Banners With your Cricut
Here are some steps are as follow
Step – 1: Upload Images
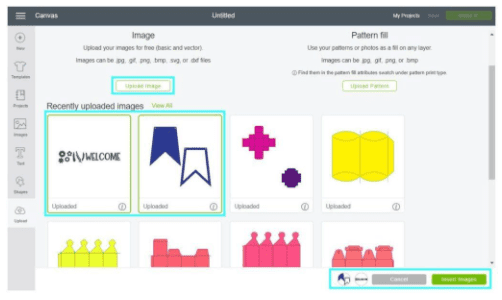
The first thing you will need to do is log into your Cricut Design Space account and click on the upload option located on the left panel of the canvas area. Once you are in this option, click on the upload image button, then choose the SVG from your computer and save it to Cricut Design Space.

After uploading your files, select them from the Recently Uploaded Images and click on Insert Images, here you will get to insert the images that will be grouped together.
Step – 2: Ungroup Images
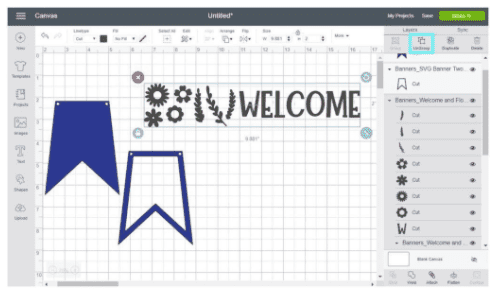
As we’ve mentioned, by default settings, both SVG files will be ungrouped and since you need to work with each layer individually, you will go ahead and select each file and click on the ungroup location located at the top of the Layers panel.

Step – 3: Arrange Flowers and Weld
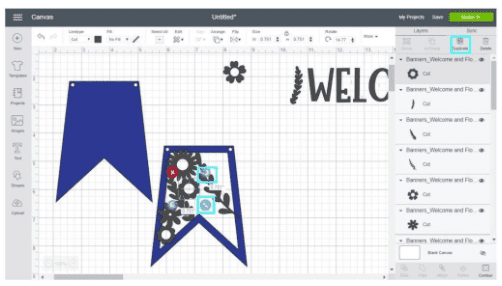
On this step, you shall be using the flowers and branches to create a cut-out effect on your banner. Each element must overlap either the banner, flowers, or branches as you can’t leave any of the elements floating in the middle because they will fall out in the cutting process eventually.
Once you’ve ungrouped the welcome and flowers sign as shown, you will need to duplicate and rotate some of the flowers and branches until you fill the hollow blue banner. Remember to make sure all these parts are overlapping each other!

Step – 4: Change Colors, Duplicate and Resize
At this point, the banner is pretty much complete and only final touches need to be made to it with just a few details left to be tweaked if you would like it to. You can change colors by selecting the layer and clicking on the little square next to the line type option located on the top panel of the canvas area.
Step – 5: Banner Cutting Process
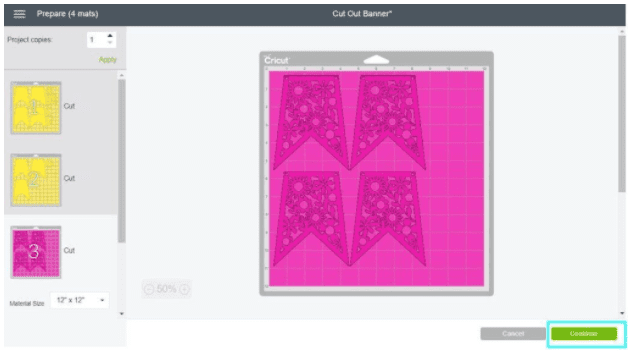
The final method is cutting your banner. Before you do this, if you have only one mat, weed it and then clean it. It is always better to have two mats of each color so that way, whenever you have these types of projects coming about, you can weed and remove your design while your Cricut is cutting.
Further Adjustments
If you would like to make any further adjustments then you can do so if you want to resize your banner then just select the two parts that make the banner and resize them. Then resize letters until they look good in relation to the banner. These finer adjustments are strictly according to your liking and if you think your banner looks good then no further adjustments need to be made.


