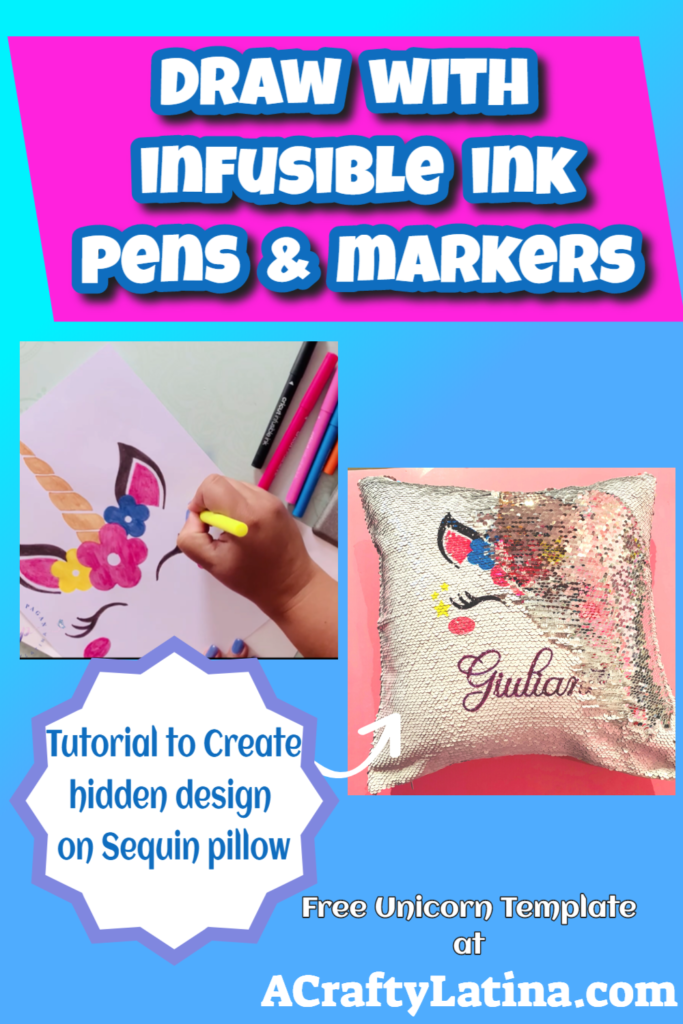
I’m so excited to bring out my inner child and use fun markers to color again. Because drawing with Infusible Ink Pens & Markers is so satisfying you feel like a kid again and want to color everything. As a result, I finally got brave and did one of those hidden secret designs on a sequin pillow. Sometimes you just have to go for it and learn as you go. Don’t forget to watch the tutorial video at the bottom of this post to see all of the steps in action.
Of course, I wanted to share all of the details with you and some things I learned along the way. So let’s get started with our secret sequin pillow drawing with Infusible Ink Pens & Markers.
BONUS: I have included the unicorn SVG file I used in my Resource Library, click below to gain access to this and many other files.

Supplies Used (Click item to open link):
This post contains some affiliate links for your convenience; this means if you make a purchase after clicking a link I will earn a small commission but it won’t cost you a penny more it will just help me to continue to be able to provide you great tutorials and free projects. As an Amazon Associate I earn from qualifying purchases.
Select and Prep your Image/Phrase
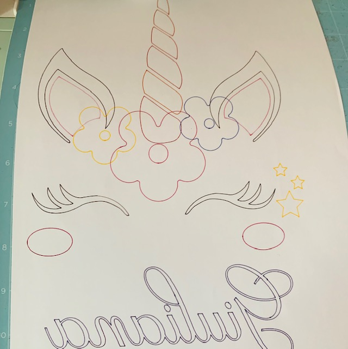
The first thing you need to do is decide which image or phrase you are going to use. The unicorn SVG I used is in my Free Resource Library if you want to use that; however, you can use any image or phrase you want, the steps will be the same.
NOTE: If you have never uploaded an image into Design Space, you can review this video first
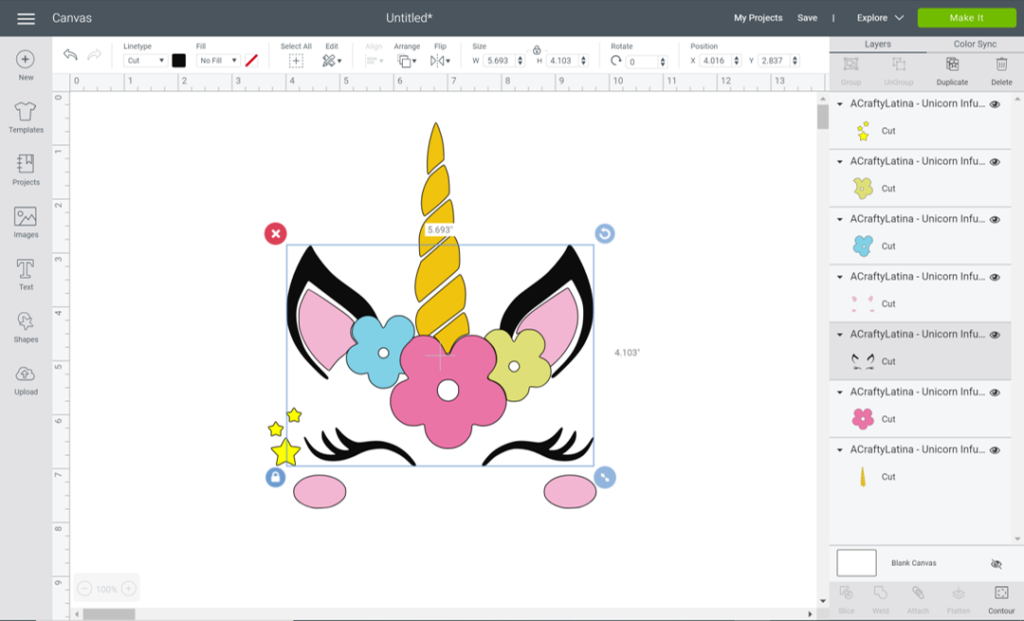
Once your image is uploaded, make sure it is not grouped or attached. You will be able to tell because when you click on a section of your image it should just put a box around what you clicked only.
TIP: Even though it’s ungrouped you can attach the colors that go together as I have. You will see when I click on the black ears, the eyelashes are attached as well. That way I can change everything to draw that goes in the same color at one time. The goal is to keep the same pieces in the same color together so when you change it to “draw” it changes them all at once.
Change for Drawing
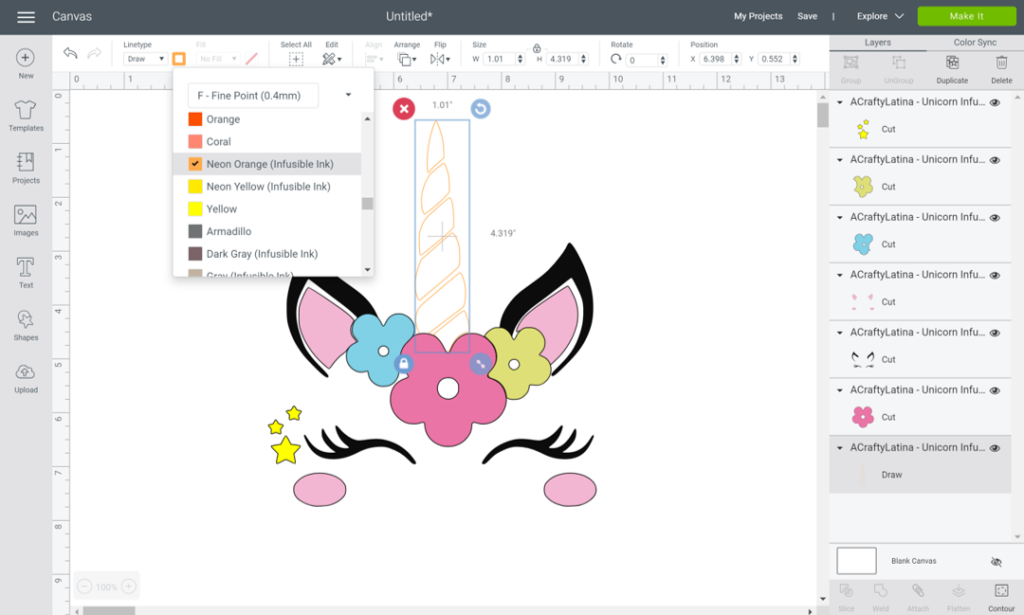
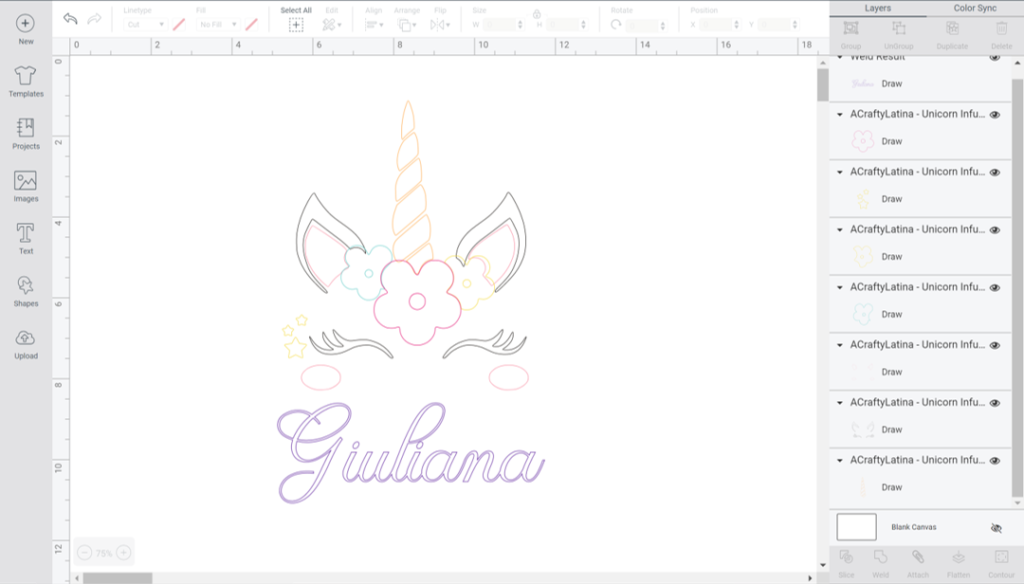
Now that your image/phrase is ready, you will need to give Cricut the instructions for drawing with Infusible Ink pens & markers. That means we need to select each color grouping. Go to the top of your PC or Mac and look under Linetype or select draw under Edit on your iPhone.
Once you select Draw, you can then change the color selection and scroll down through the colors to pick what works best for your design. The best part is that the colors already say (Infusible Ink) next to them. Check your inventory to make sure you have the color pen/marker you selected.
Note: So you can decide how thick you want your lines of the design to be drawn make sure to either select the pens at 0.4 or markers at 1.0. I used the pen to draw and the marker to fill it in.
Your image should now look like an outline of your design/phrase. Each section should be in the color you selected as well.
STOP! READ THIS BEFORE SENDING TO DRAW
Learn from my mistakes. The first time I sent this to draw I quickly realized that when drawing, the lines were crossing over each other. I had to go back and slice out areas of my project so that the lines blended together as opposed to being on top of each other.
Once you are happy with everything, go ahead and hit Continue. Place your paper on your Cricut mat. I recommend you use the blue one because it’s for light material and won’t rip your paper when you try to remove it.
Size it Properly
Before you start drawing with your Infusible Ink pens & markers, you need to make sure that your project fits properly on the surface you are going to use.
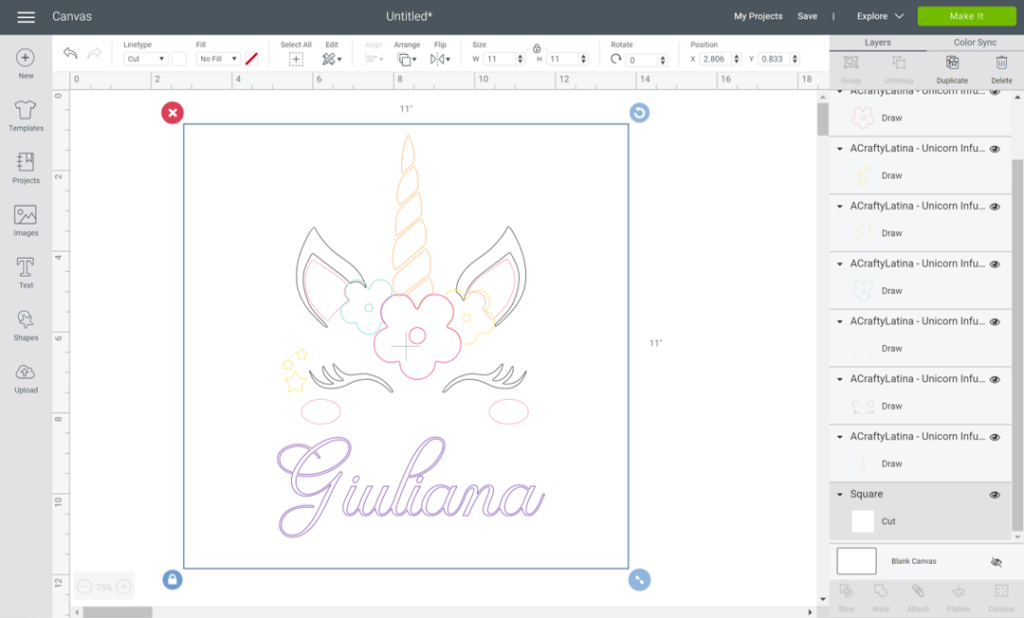
Although my pillow cover is 12 x 12 I don’t want my image to be that big because I’m also adding her name at the bottom.
I downloaded the Olivia font from dafont. Click here to learn how to upload new fonts into your PC for use in Design Space. It works out perfectly because I actually want it to write it in the open bubble format so that I can draw it in.
I created an 11 x 11 box from the shapes tab to make believe it’s the size I want to fill on the pillow case. I then center my image and name on it and size accordingly. Now I know the design will fit perfectly.
NOTE: If you use this method, make sure to hide or delete the background shape as you will not need it and may affect your design. Cricut may think it needs to cut that out when in fact we are only drawing for this project, not cutting anything.
Once you hide or delete the back square, highlight the entire design to be drawn and hit attach.
Prep Your Mat
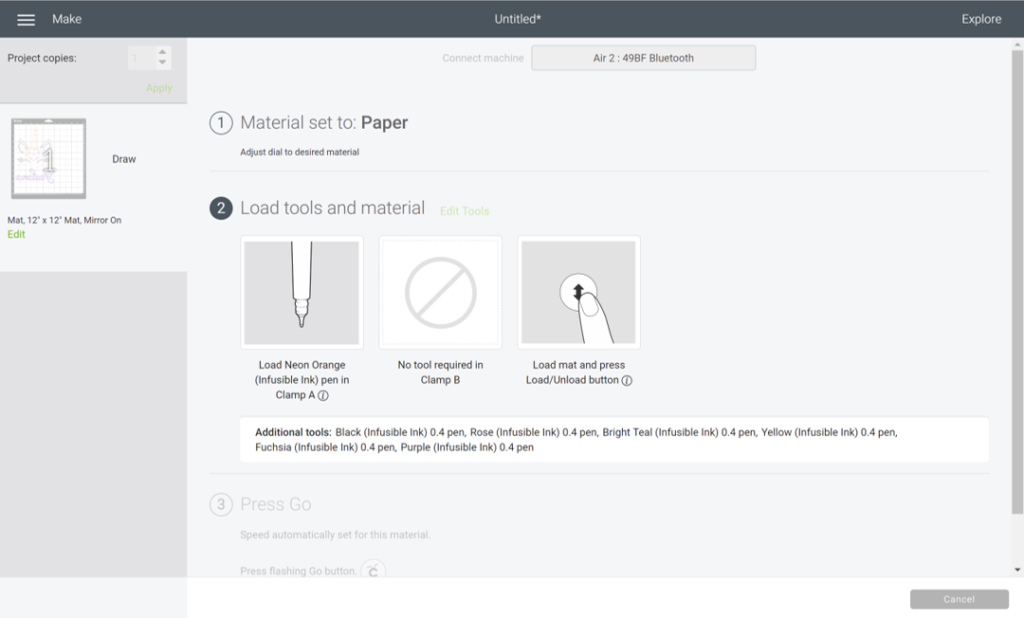
Once your design is all set you are ready to get your Cricut drawing with Infusible Ink pens & markers. Go ahead and hit Make It. Your entire design should now be on the prepare mat screen.
This IMPORTANT final step is crucial. Mirror your image! Yes, because you are drawing it, the paper will eventually be flipped over so you need to mirror it.
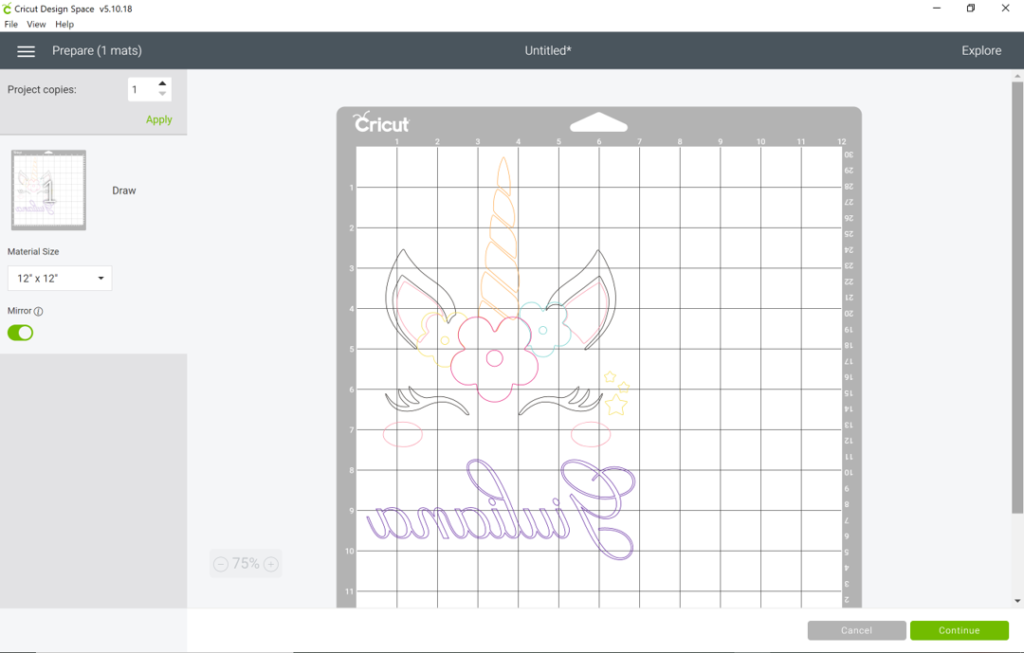
Note: Since my image was not bigger than 11”, I used an 8 ½ x 11 paper. I only have an inkjet printer so that’s the paper I used. I knew I was taking a chance but really wanted to test this out.

Let’s Draw
I set my Cricut to paper; however, the material selection does not matter because we are not cutting anything. You will also notice that it is already telling you which color pen/marker to insert in Clamp A. That’s the color it will start with. The cool part is right below that it is already telling you what additional tools you will need to get ready because they will be used next.
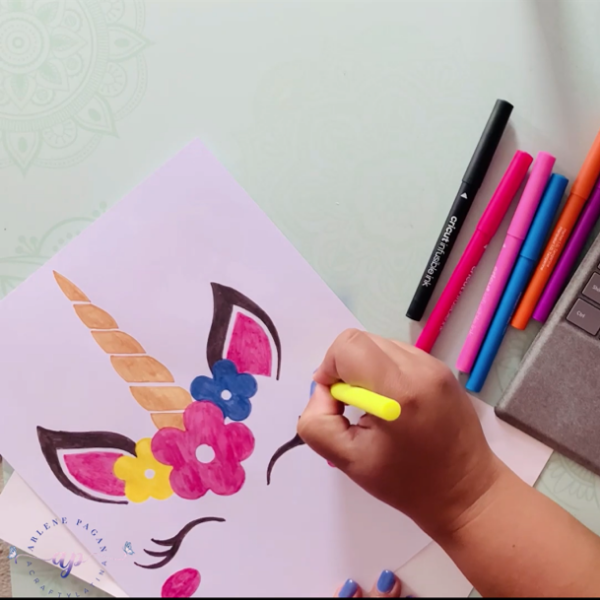
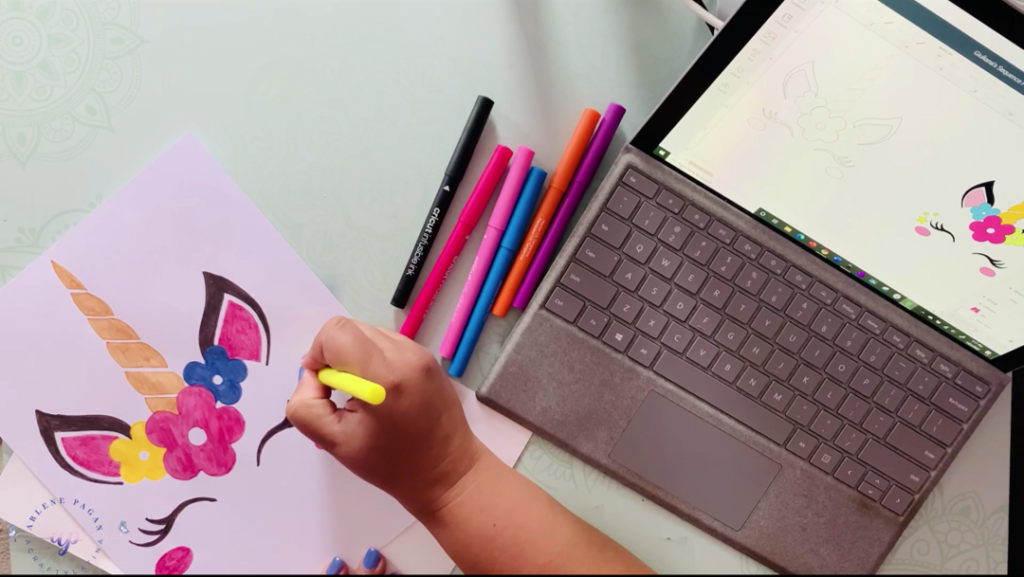
Just follow the prompts until all of your image is drawn. Once your Cricut has finished drawing now comes the fun part. Select the color infusible ink markers and start coloring it in. Remember to stay between the lines because any color that is outside of your design will transfer over to the final surface once heated.
Tip: Keep a copy of your filled-in image on your Canvas so that you can refer back to it as you color.
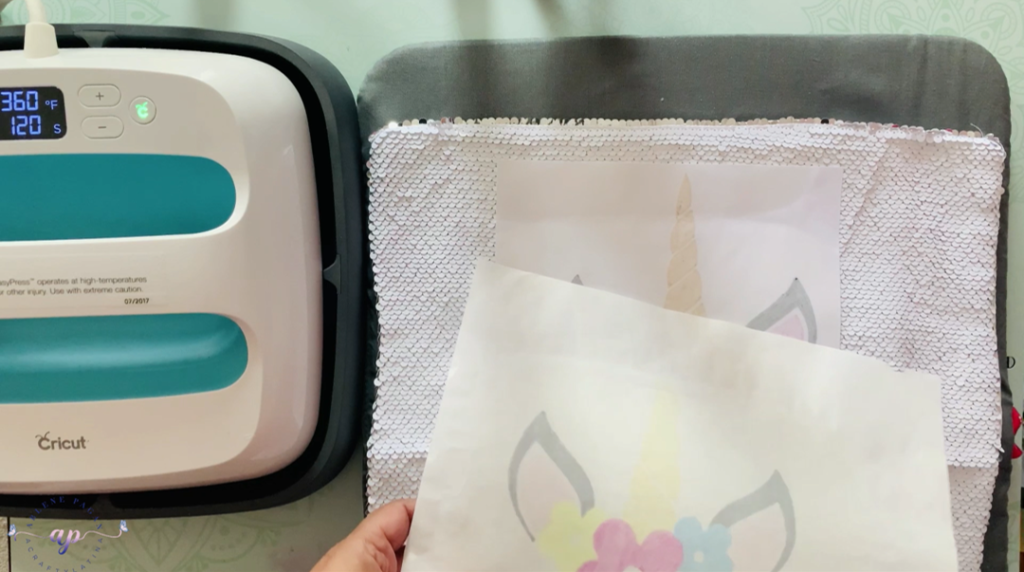
Setting up EasyPress
You will need to follow the temperature setting and guide depending on what Cricut EasyPress or heat press you have. I have the original EasyPress and set my temperature for the sequin pillow case at 360 degrees and left it on for 120 seconds. You can find the Heat Guide for all Cricut machines here. The pillow case is not a Cricut surface so I could not find the exact settings; however, I used the same settings from previous projects I’ve done.
Steps to follow
There are some important steps to follow when transferring your drawing with Infusible Ink pens & markers to your surface.
- Make sure to place your heat resistant mat on a hard surface
- Make sure to put 1 or 2, 110 lb white cardstock piece(s) of paper inside the pillowcase to prevent the ink bleeding through
- Swipe down the sequins on the pillow so that only the white ones are showing
- Place your image color side down on your surface
- Tape in place with heat resistant tape
- Place butcher paper on top of image
- Set the EasyPress or heat press over it and let it be. No pressure needed.

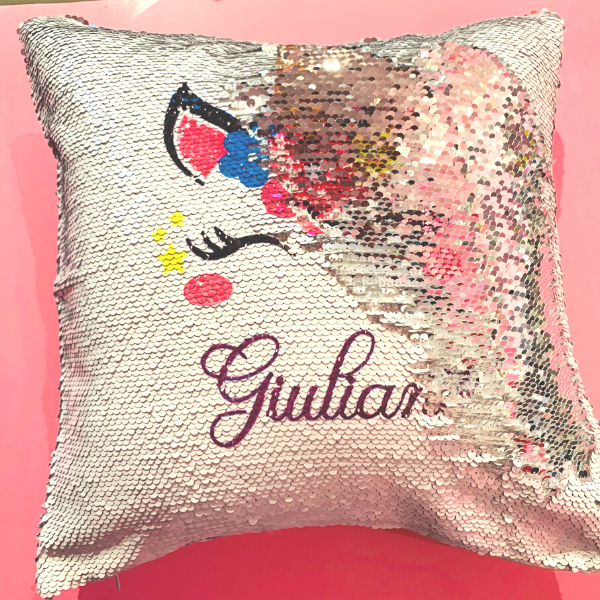
Because the EasyPress and project will be very hot, please let it cool down before touching. Remove the butcher paper and slowly remove the tape. Take off the paper with the image and there you have it, you should have a beautiful image transferred onto your pillow.
Do you remember I told you that I used regular inkjet printer paper for my design? Well now I know why laser printer paper is better. It can withstand the high heat and the image won’t bleed through the paper. As you can see, the ink bled through my inkjet printer paper and the butcher paper. But oh well, that’s a small price to pay for the success I had with this project. In a pinch I know I can use this paper. I just have to be ready to throw out my butcher paper afterwards.
We Did It!
There may be a lot of steps to drawing with Infusible Ink pens & markers, but it is really easy. Not to mention that it is so amazing that we actually created this! Anyone would love this gift with a hidden surprise.
I know we get stressed out and impatient with our machine and ourselves. But with a little bit of bravery and some patience we can accomplish anything.
Don’t forget to watch the step-by-step video below. I would love to see what creations you make with your pillows or any other infusible ink project. Feel free to ask any questions you may have in the comment section below.
Remember, have fun and always Love What You Do and Do What You Love.