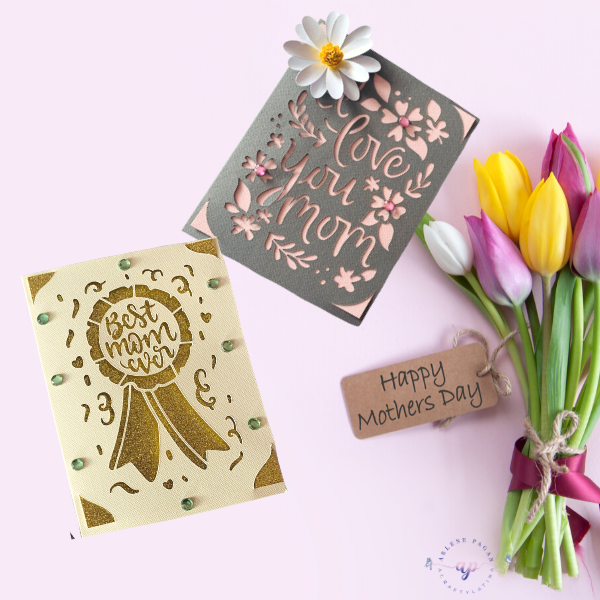
ACRAFTYLATINA

  • Home
  • Special Projects
    • Weddings
      • Wedding Table Numbers
      • DIY Wedding Invitations with your Cricut
      • Wedding DIY Countdown Sign โ€“ ?? Until I Do
      • Wedding Planning Checklist
      • Abide by Second Wedding Etiquette; Says Who?
      • I Do in Las Vegas
      • Easy Cricut Wedding Projects
    • Sublimation
      • Sublimation to Expand Your Crafting Experience
    • Holidays & Seasonal
      • Make Dad’s Day Special With Your Cricut
      • Create Layers with Contour in Cricut Design Space
      • Fun Projects for Valentine’s Day
      • Home Decor for the Holidays
      • Custom 3-layer Christmas Ornament in Cricut Design Space
      • Christmas Countdown with Cricut
      • Freebies for your Holiday Decor with Cricut
      • Fun 4th of July Decor with Cricut
      • Mother’s Day Card With Your Cricut Joy
      • Motherโ€™s Day Flower Shadow Box
      • Happy Spring Wreath Floral Display
      • Good Fortune This Valentineโ€™s Day
      • Let Cricut Help Color Your Valentine
      • Love Mason Jar
      • Cricut-made Christmas Dish Towels
      • Personalized Christmas Stockings with Cricut
      • Santaโ€™s Milk & Cookies Plate
      • Ornament in Memory of a Loved One
      • Glitzy Holiday Gift Tags
  • Everything Cricut
    • Donโ€™t Be Afraid of Your Cricut, Itโ€™s Friendly
    • How to Use the Cricut Offset Feature
    • Top 10 Tips for Cricut Design Space
    • Drawing with Infusible Ink Pens & Markers
    • Create Custom Stickers Using Your Cricut
    • Back to School
    • Cricut Infusible Ink – What it is and How to Use It
    • Make Beautiful Flowers with Cricut Design Space
    • Family Birthdays Knockout Design
    • Unbox & Setup the New Cricut Joy
    • Write With Your Cricut
    • Upload Fonts To Use In Cricut Design Space
    • Mini but Mighty EasyPress
    • Uploading Your Image from PC to Design Space
    • How To Use Print Then Cut in Cricut Design Space?
    • How to Use Weld in Design Space
    • How to use Cricutโ€™s Design Space Slice Feature
  • Video Tutorials
  • Favorite Crafting Supplies
  • Meet Arlene
  • Contact Me
  • Resource Library

Mother’s Day Card With Your Cricut Joy

Holidays & Seasonal

3 May

Well guess whatโ€™s next week?  If you said Motherโ€™s Day, youโ€™re right.  I donโ€™t know about you, but it kind of snuck up on me.  My schedule is all messed up with everything that is going on.  So Iโ€™m here to show you how you can make a quick Motherโ€™s Day Card with your Cricut Joy that is sure to bring a smile to your Mom’s face.

Honestly, I donโ€™t think Iโ€™ve ever made a card so quickly in my life.  The longest part was while it was cutting.  You’ll see as we go through the steps but first letโ€™s get our supplies ready.

Supplies Needed

Cricut Joy cutting machine

Insert Cards specific for use with Cricut Joy (I used the Glitz & Glam and the Pastel Sampler)
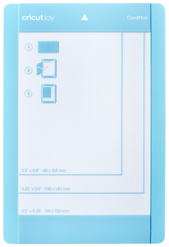
Cricut Joy CardMat

Scraper Tool to clean your mat afterwards

Access to free resource library

Pick A Card Any Card

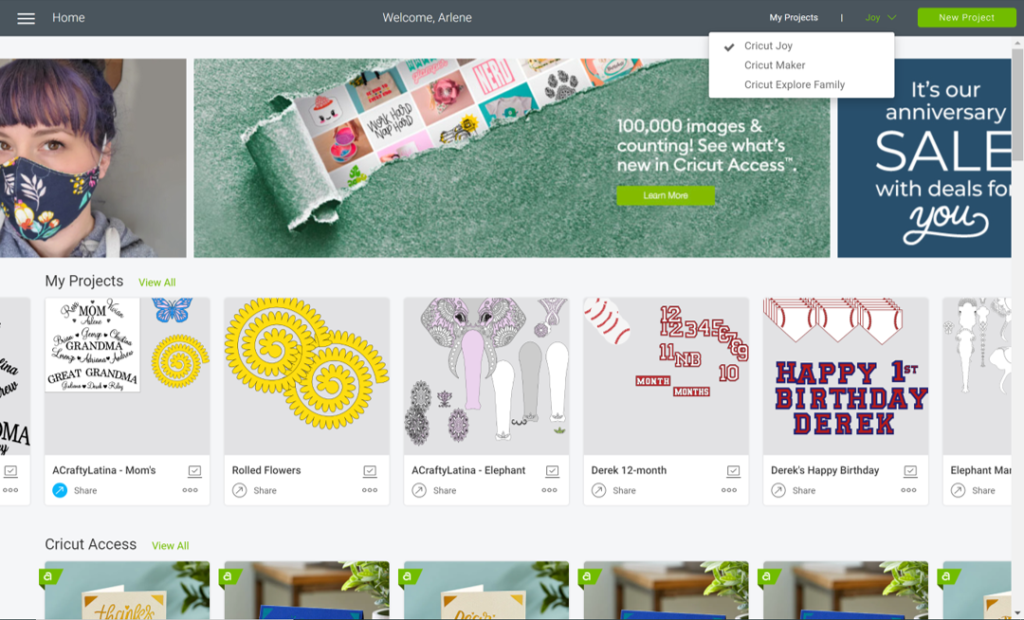
There are so many choices to pick from when making a Motherโ€™s Day Card with your Cricut Joy.  Once I opened Design Space, the first thing I did was to make sure to select the right machine at the upper right hand corner.  What that does is eliminate all of the Cricut Access projects that are not compatible with the Cricut Joy.  I donโ€™t want to set my heart on a design I canโ€™t make, so itโ€™s better to just kick them out from the beginning.

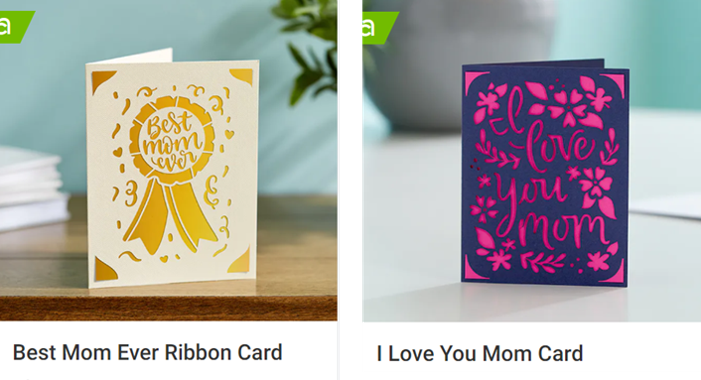
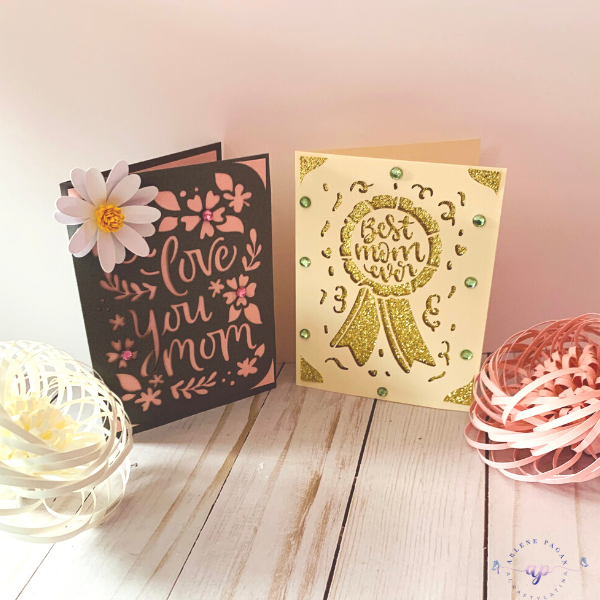
Once that is done, you will see your card selections change under Cricut Access.  Scroll through and select the one that speaks to you.  I chose the Best Mom Ever and the I Love You Mom cards for this project.

Tip:  Make sure to click on View All so that you can see everything that is available to you.

Make Sure You Have the Necessary Supplies Ready

Once you find the card you want, click on your selection and the Description box appears.  On this screen you will see several things that are important to completing your project.  You will find this exact screen for any ready-to-make project in Cricut regardless of which machine you are using.

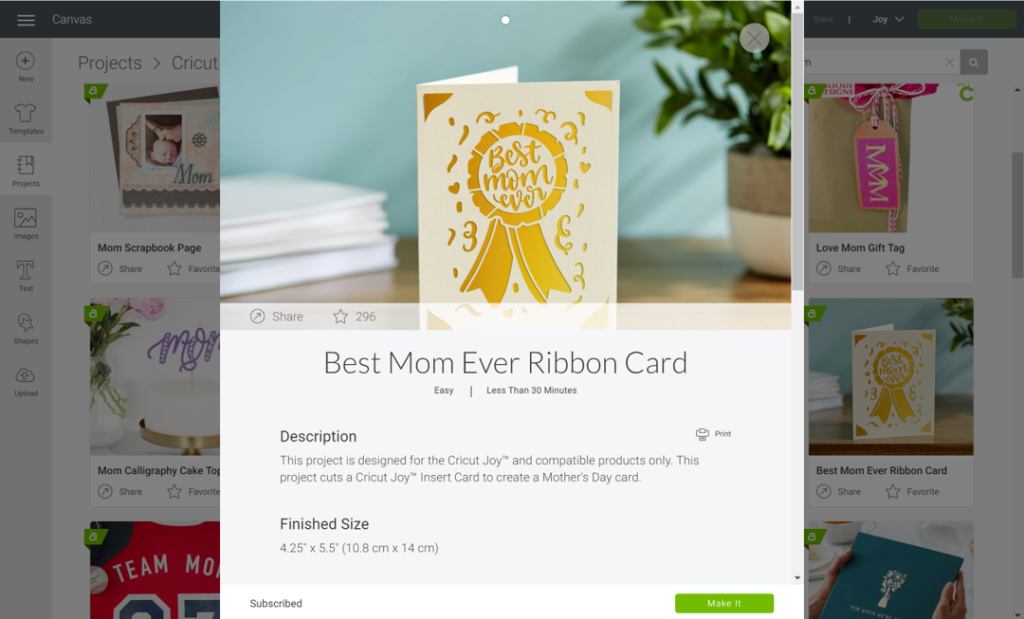
Description tells you that this project is designed specifically for Cricut Joy and the insert cards.

Finished Size tells you the material size you will be using.  As this was created specifically for the Cricut Joy insert cards it is to those specifications already.

Materials to Cut will tell you what is needed to create this project.  For this one it is the Cricut Joy insert cards. It also tells you any additional tools needed; for this project we will also need the Cricut Joy Card Mat and scrape tool.

Preparation shows you the steps on how to get your project ready for your machine.  In this step you will place your Cricut Joy insert card into the special card mat.

Tip:  If you have never worked with the Cricut Joy Card Mat before, I encourage you to visit Cricut Joy Insert Cards and Card Mat 101.  

Cut will tell you to insert the blade into the housing when you are ready to cut your project.  

Note: that there is only 1 housing on the Cricut Joy, so if you ever do a project that also involves writing, you will have to alternate between the 2 tools.  

Assembly informs you what to do after your project is complete.  In this case you will take one of the insert cards included in the package and insert into the corner cutouts.  Be careful when you do this so that you donโ€™t push through too hard and cause the cutout to rip further.  

Actually Cutting the Project

Once youโ€™ve read all of the instructions, you will click on โ€œMake Itโ€ at the bottom right hand corner and your final review page will pop up.  This is where you have the last chance to review settings, selection of mat and make sure this is the correct project you are sending to cut.
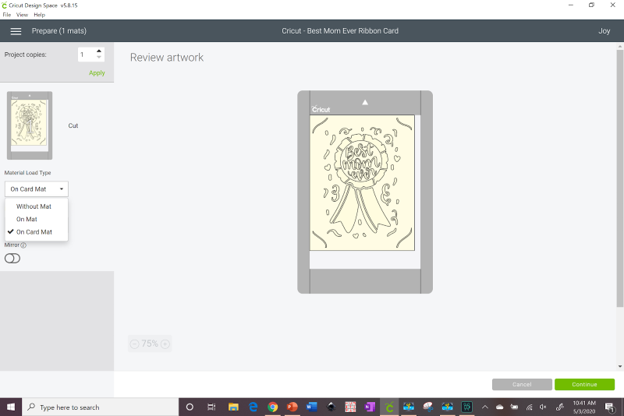
Letโ€™s discuss the 3 mat options that show up on the left under Material Load Type.  If you click on the little down arrow you will see that 3 options show up.

Without Mat – that is if you are using the Cricut Joy Smart Vinyl.  This product has its own backing and you will not need to put it on the mat.

On Mat – if you are using cardstock other than the Cricut Joy insert cards you will need to place the material on the mat.  This is just a smaller version of the green Cricut cutting mat you are used to.

On Card Mat – which is what we will be using to cut our Motherโ€™s Day Card with your Cricut Joy, is the specialized mat that letโ€™s you insert the flap of the insert card behind the sticky part.
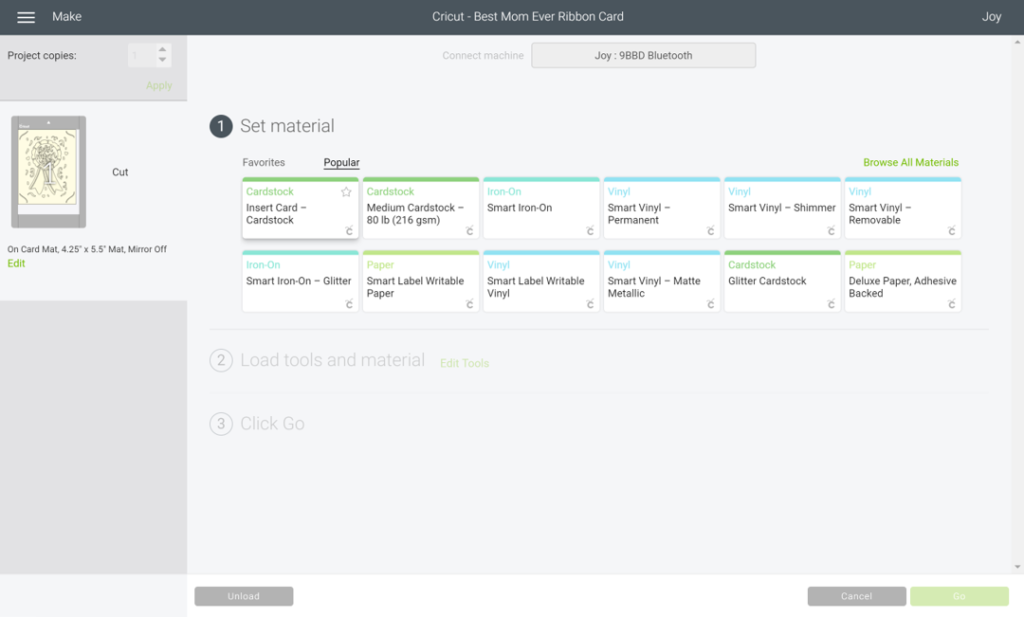
When youโ€™re done reviewing, hit โ€œContinueโ€ at the bottom right and select your material.  Search for Insert Card Cardstock and select that option.

Final Steps

Once you select the material it will automatically move you to the next screen where it will ask you to make sure the blade is inserted and to insert your mat.  Once you are ready, click on “Go” at the bottom right and your machine will start cutting your project.

Note:  for the Cricut Joy there are no buttons on the machine, you will just put the mat under the guides and it will automatically grab it. 

https://acraftylatina.com/unbox-setup-the-new-cricut-joy/

Completing Your Project

Once complete you will have the opportunity to either Rerun or Release.  If you think your project needs another pass so that everything is fully cut, DO NOT REMOVE your project and just hit Rerun.  If you are done, you can release it.

Thatโ€™s it, youโ€™ve made your Motherโ€™s Day Card with your Cricut Joy.  Just insert the backing into the corner cutouts and get it ready for Mom. You can also add some embellishments if you choose to. For these, I used crystals and a little daisy to give it an extra special touch.

I hope you found this useful and are ready to make your cards. Please feel free to share your creations with me, I would love to see them. You can always reach me at hello@acraftylatina.com if you have any questions as well.

Remember, to always Do What You Love, and Love What You Do.

https://acraftylatina.com/mothers-day-flower-shadow-box/

Related Articles:

Freebies for your Holiday Decor with Cricut

AMAZON PRIME DAY 2020

Tweet
Share
Pin8
Share
8 Shares

Subscribe

Sign up for the latest news and updates

Previous Post: « Advice for Couples Impacted by the Coronavirus
Next Post: Family Birthdays Knockout Design »

Primary Sidebar

Let’s Connect

  • Email
  • Facebook
  • Instagram
  • Pinterest
  • YouTube

Meet Arlene

Welcome to ACraftyLatina! My name is Arlene Gonzรกlez-Pagรกn and my passion is helping others. Read Moreโ€ฆ

Latest on Instagram


Celebrated my bday this weekend and started with t
Celebrated my bday this weekend and started with the best affirmation and attitude #psiloveme #acraftylatina #cricutmade #htv #birthdayweekend

Happy Motherโ€™s Day! May you have a beautiful day
Happy Motherโ€™s Day! May you have a beautiful day surrounded by love ๐Ÿ’— #mothersday #momlife #momsofinstagram #acraftylatina

Getting ready for #mothersday #momgifts #cricutmad
Getting ready for #mothersday #momgifts #cricutmade #makeitwithmichaels #diycrafts #acraftylatina

Fun Easter projects; blog link in bio #acraftylati
Fun Easter projects; blog link in bio #acraftylatina.com #diycrafts #coloring #eastercrafts #craftingismytherapy #cricutmade #acraftylatina #easter

TGIF my friends! Make the most of your day and rem
TGIF my friends! Make the most of your day and remember, your uniqueness is your greatest asset. ๐Ÿฅฐ #beyou #youruniquestyle #confidence #tgif #acraftylatina

Happy 1st day of Spring. A season of new beginnin
Happy 1st day of Spring.  A season of new beginnings ๐Ÿฆ‹ #springisintheair #firstdayofspring #newbeginnings #acraftylatina


Follow on Instagram


Subscribe

Sign up for latest news and updates

Browse by Category

  • Cricut
  • Everything Cricut
  • Special Events
    • Holidays & Seasonal
    • Weddings
  • Sublimation
Celebrated my bday this weekend and started with t Celebrated my bday this weekend and started with the best affirmation and attitude #psiloveme #acraftylatina #cricutmade #htv #birthdayweekend
Happy Motherโ€™s Day! May you have a beautiful day Happy Motherโ€™s Day! May you have a beautiful day surrounded by love ๐Ÿ’— #mothersday #momlife #momsofinstagram #acraftylatina
Getting ready for #mothersday #momgifts #cricutmad Getting ready for #mothersday #momgifts #cricutmade #makeitwithmichaels #diycrafts #acraftylatina
Fun Easter projects; blog link in bio #acraftylati Fun Easter projects; blog link in bio #acraftylatina.com #diycrafts #coloring #eastercrafts #craftingismytherapy #cricutmade #acraftylatina #easter
TGIF my friends! Make the most of your day and rem TGIF my friends! Make the most of your day and remember, your uniqueness is your greatest asset. ๐Ÿฅฐ #beyou #youruniquestyle #confidence #tgif #acraftylatina
Happy 1st day of Spring. A season of new beginnin Happy 1st day of Spring.  A season of new beginnings ๐Ÿฆ‹ #springisintheair #firstdayofspring #newbeginnings #acraftylatina
Contour in Cricut Design Space is a great way to c Contour in Cricut Design Space is a great way to create layered images.  Check out my new blog post; link in bio. #cricut #cricutmade #cricutdesignspace #cricuttutorial #cricutcontour #cricutforbeginners #acraftylatina #cricutmademedoit #cricutmade #stpatricksday
Monday hustle! Get up and show up. #mondayhustle Monday hustle! Get up and show up.  #mondayhustle #inspiration #mondaymotivation #acraftylatina
Are you ready for Santa? #cricutchristmas #cricut Are you ready for Santa? #cricutchristmas #cricut #cricutmade #oreo #cricutcrafts #vinylprojects #cricutaddict #acraftylatina #cricut
A little something for me ๐Ÿ˜Š #cricut #cricutmade A little something for me ๐Ÿ˜Š #cricut #cricutmade #cricutcrafts #htv #monogram #acraftylatina #makeupbag #easypress #cricuteasypress
Follow on Instagram
  • Home
  • Meet Arlene
  • Contact Me
  • Video Tutorials
wedding-invitations-with-your-cricut

Copyright © 2022 ยท Acraftylatina.com

Manage Cookie Consent
We use cookies to optimize our website and our service.
Functional cookies Always active
The technical storage or access is strictly necessary for the legitimate purpose of enabling the use of a specific service explicitly requested by the subscriber or user, or for the sole purpose of carrying out the transmission of a communication over an electronic communications network.
Preferences
The technical storage or access is necessary for the legitimate purpose of storing preferences that are not requested by the subscriber or user.
Statistics
The technical storage or access that is used exclusively for statistical purposes. The technical storage or access that is used exclusively for anonymous statistical purposes. Without a subpoena, voluntary compliance on the part of your Internet Service Provider, or additional records from a third party, information stored or retrieved for this purpose alone cannot usually be used to identify you.
Marketing
The technical storage or access is required to create user profiles to send advertising, or to track the user on a website or across several websites for similar marketing purposes.
Manage options Manage services Manage vendors Read more about these purposes
View preferences
{title} {title} {title}