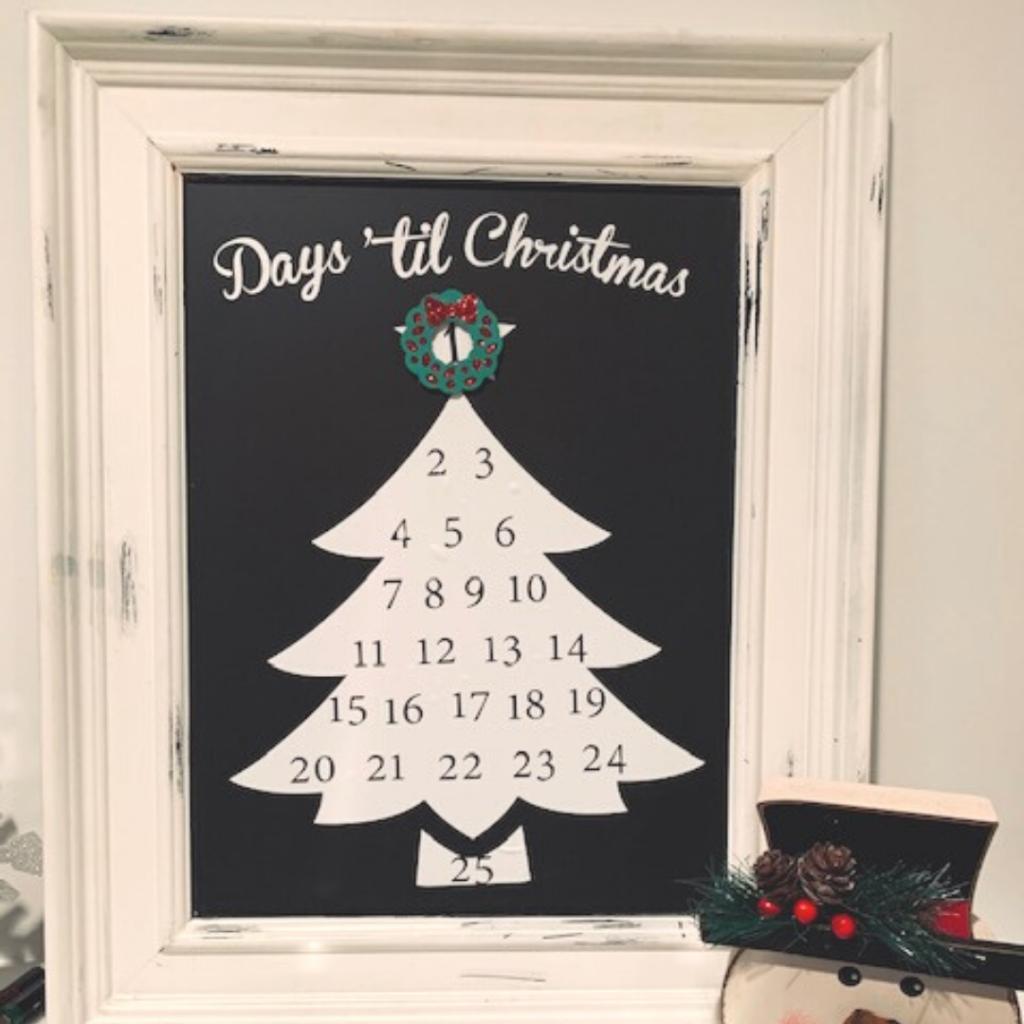
It’s finally here! December has arrived and I’m so excited. It’s my favorite time of the year and boy do we all need some cheer right about now. To help track the month I’ve created a fun and simple Christmas Countdown with Cricut Design Space. Let’s get started!
Make sure to scroll to the bottom to see these steps in action.
Supplies
- Cricut Machine
- Cricut Design Space
- Cutting Mat
- Weeding Tool
- 631/651 vinyl
- Red and Green cardstock
- Surface/picture frame

Find Your Images
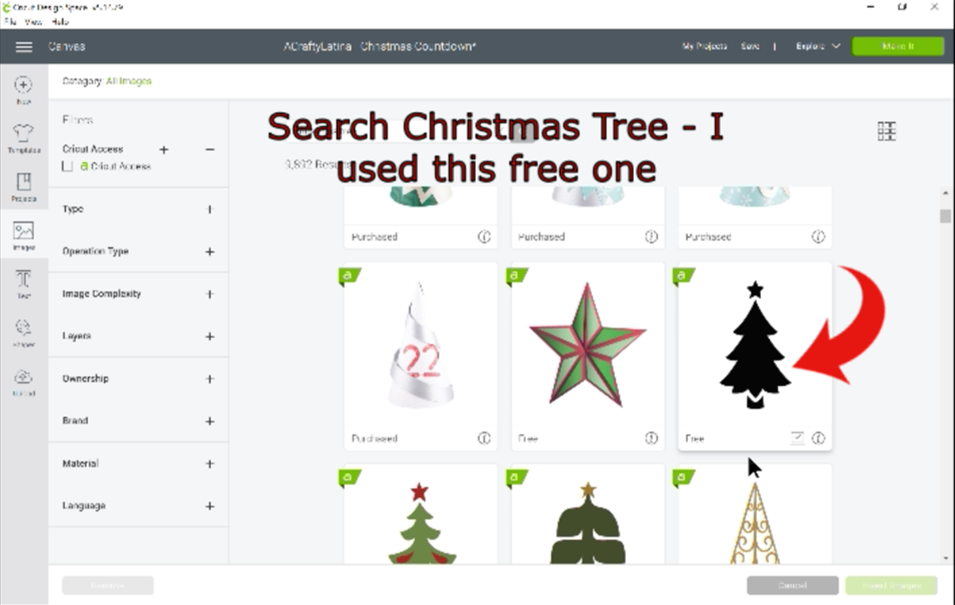
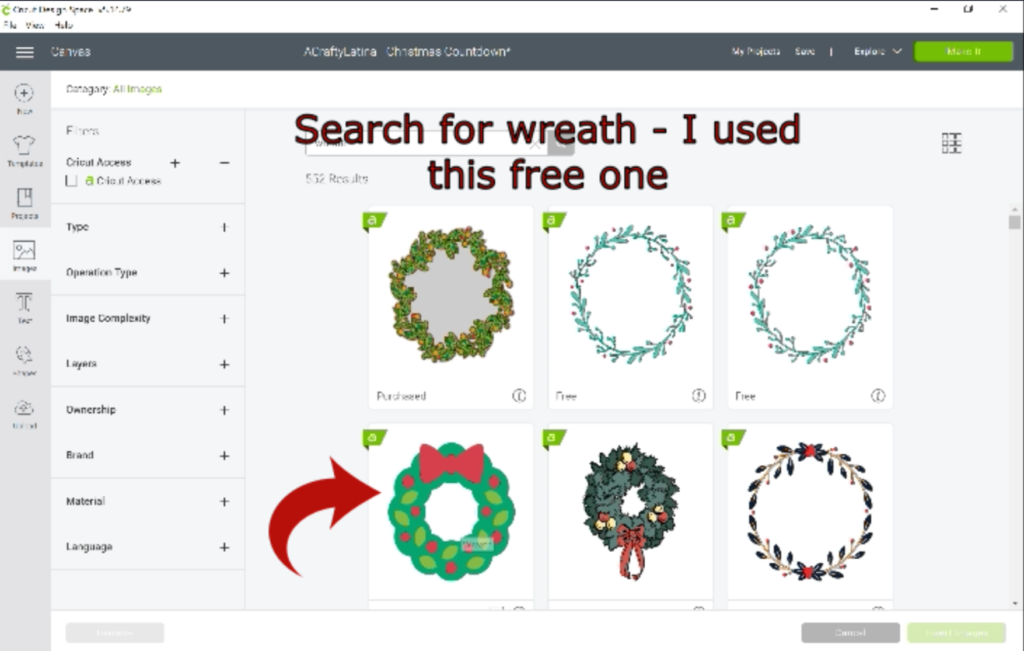
Our first step in creating our Christmas Countdown with Cricut is to find the free images we can use. If it’s free, it’s for me! Once you have your canvas open, click on images and find the Christmas Tree and Wreath Images. I used the ones referenced below.
Set Up Your Tree
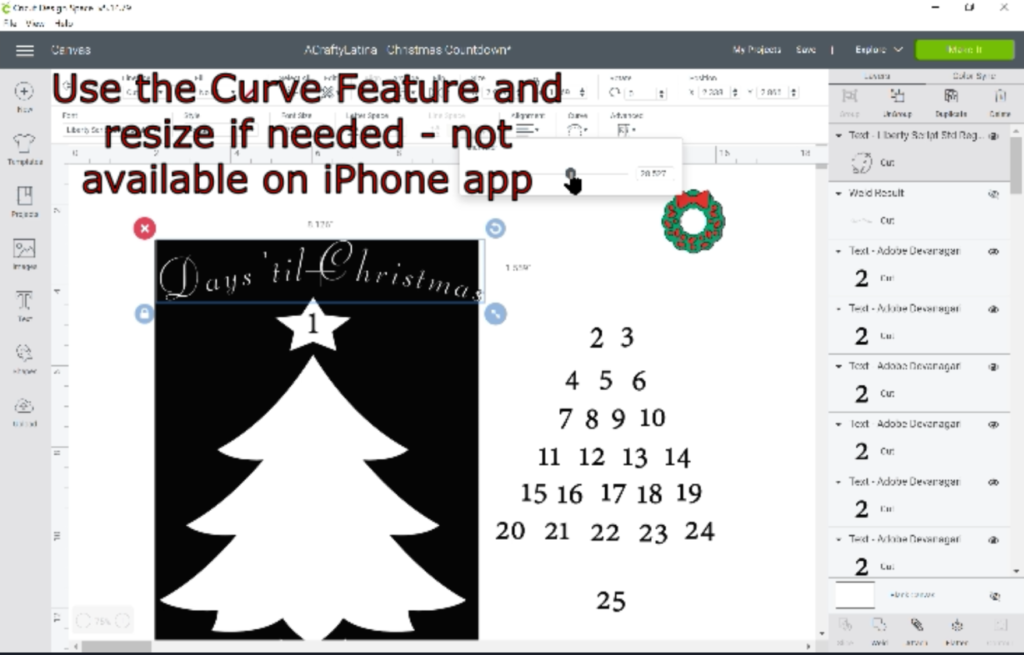
Once you bring in the images, create a shape the size of your surface so that you can layout your design. Resize the tree to fill the surface area. Remember to leave space at the top for the heading.
Type the Days ’til Christmas heading or however you want to count the days down. Move to the top and use the curve feature if you’d like. Unfortunately, the curve feature is NOT available on the iPhone app. Now your Christmas Countdown with Cricut is beginning to take shape.

Add The Dates on Your Tree
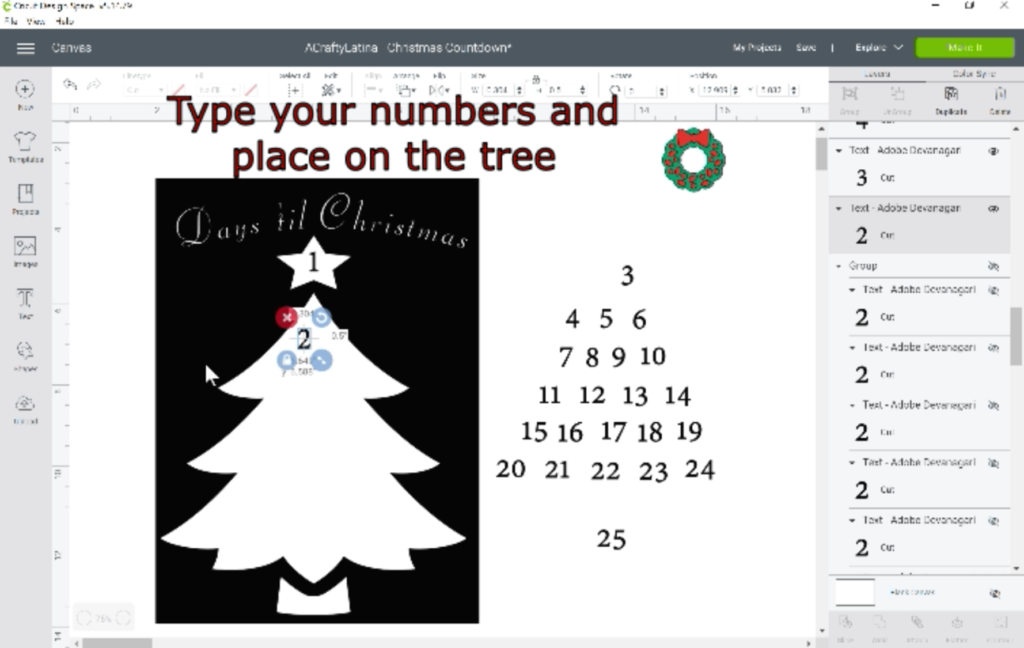
Now that you have your tree set up, it needs some dates on there to actually be a Christmas Countdown with Cricut. I suggest using a simple font that won’t take up too much space with swirls or curls. Type out all of your numbers and lay them out on the tree for spacing.
Once the numbers are all layed out, you will use the slice feature to cut them out of the tree image. READ BELOW FOR A TIP ON HOW TO DO THIS MUCH FASTER
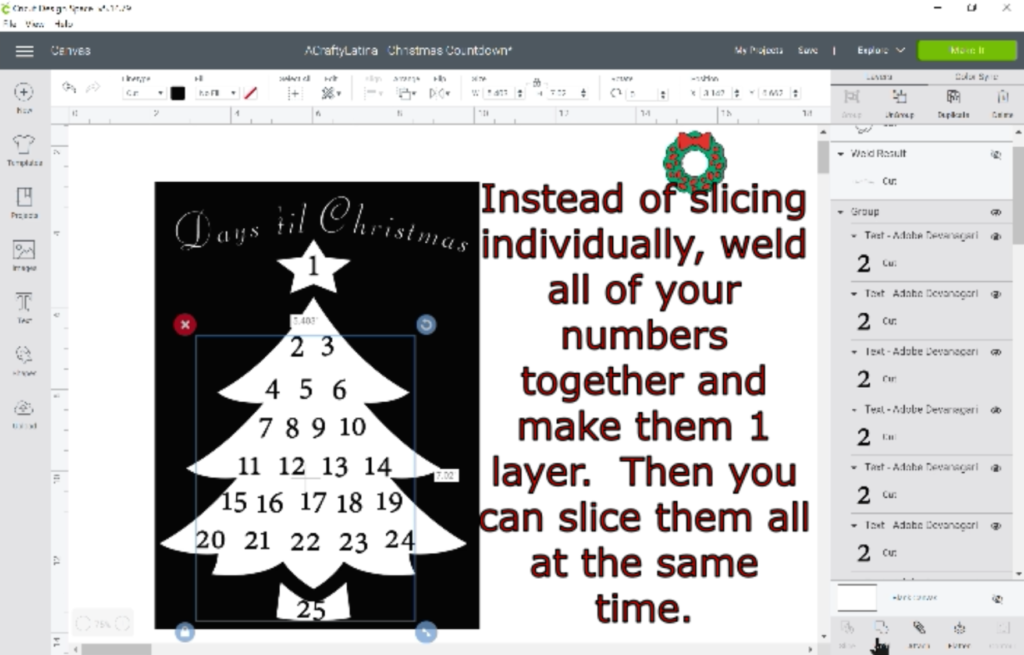
Here’s a great TIP on how to slice all of the numbers out at once.
Normally you would have to slice out 1 number at a time from the tree. However, if you highlight all of your numbers together and weld them, they become 1 layer. Then you can just select the numbers layer and the tree and slice them all out in 1 easy step. Woohoo, what a timesaver!
Final Steps
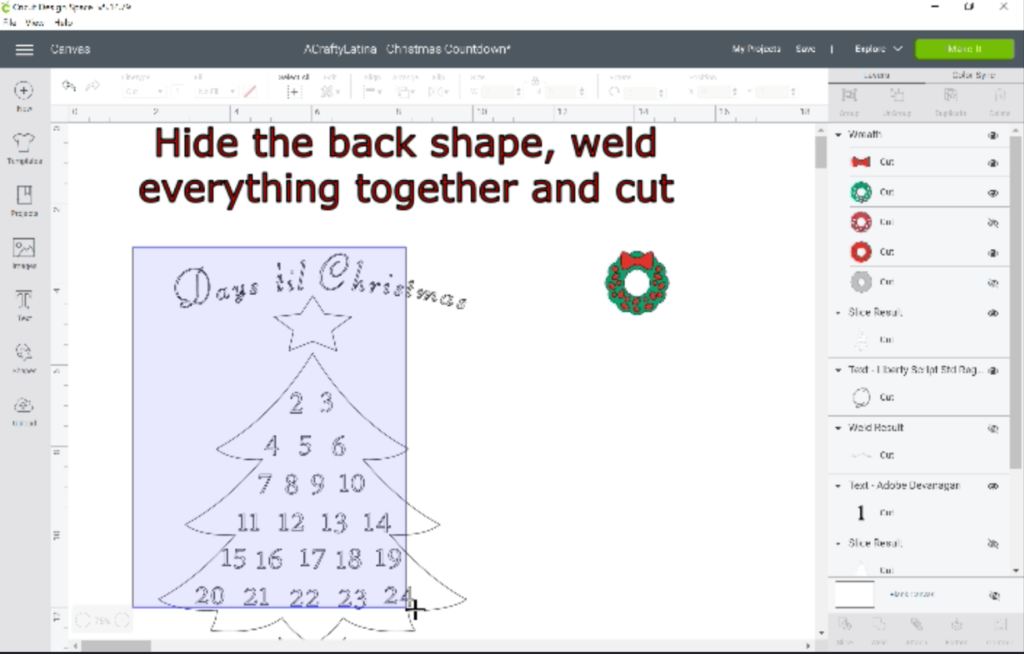
There are only a couple of steps left before you can cut out your Christmas Countdown with Cricut. First, let’s hide the background shape you created. Then highlight your heading and tree and hit attach. That will ensure everything cuts out exactly as you have laid it out on your canvas. Finally resize your wreath image so that it’s small enough to go around your dates.
Go ahead and hit MAKE IT!
Oh I hope you enjoy making this great countdown. Make sure to visit the Resource Library for this file and other fun project files as well.


Related Articles:
DIY Wedding Invitations with your Cricut
How To Use Print Then Cut in Cricut Design Space?
This post may contain affiliate links which may provide me with a small percentage of purchased items. This does not affect the price of your product but does allow me to continue to provide you great content and free resources.


