ACRAFTYLATINA

  • Home
  • Special Projects
    • Weddings
      • Wedding Table Numbers
      • DIY Wedding Invitations with your Cricut
      • Wedding DIY Countdown Sign – ?? Until I Do
      • Wedding Planning Checklist
      • Abide by Second Wedding Etiquette; Says Who?
      • I Do in Las Vegas
      • Easy Cricut Wedding Projects
    • Sublimation
      • Sublimation to Expand Your Crafting Experience
    • Holidays & Seasonal
      • Make Dad’s Day Special With Your Cricut
      • Create Layers with Contour in Cricut Design Space
      • Fun Projects for Valentine’s Day
      • Home Decor for the Holidays
      • Custom 3-layer Christmas Ornament in Cricut Design Space
      • Christmas Countdown with Cricut
      • Freebies for your Holiday Decor with Cricut
      • Fun 4th of July Decor with Cricut
      • Mother’s Day Card With Your Cricut Joy
      • Mother’s Day Flower Shadow Box
      • Happy Spring Wreath Floral Display
      • Good Fortune This Valentine’s Day
      • Let Cricut Help Color Your Valentine
      • Love Mason Jar
      • Cricut-made Christmas Dish Towels
      • Personalized Christmas Stockings with Cricut
      • Santa’s Milk & Cookies Plate
      • Ornament in Memory of a Loved One
      • Glitzy Holiday Gift Tags
  • Everything Cricut
    • Don’t Be Afraid of Your Cricut, It’s Friendly
    • How to Use the Cricut Offset Feature
    • Top 10 Tips for Cricut Design Space
    • How to Draw with Cricut Infusible Ink Pens & Markers
    • Create Custom Stickers Using Your Cricut
    • Get the little ones ready for Back to School
    • Cricut Infusible Ink – What it is and How to Use It
    • Make Beautiful Flowers with Cricut Design Space
    • Family Birthdays Knockout Design
    • Unbox & Setup the New Cricut Joy
    • Write With Your Cricut
    • Upload Fonts To Use In Cricut Design Space
    • Mini but Mighty EasyPress
    • Uploading Your Image from PC to Design Space
    • How To Use Print Then Cut in Cricut Design Space?
    • How to Use Weld in Design Space
    • How to use Cricut’s Design Space Slice Feature
  • Video Tutorials
  • Favorite Crafting Supplies
  • Meet Arlene
  • Contact Me
  • Resource Library
  • Digital Products Etsy Shop

Fun 4th of July Decor with Cricut

Holidays & Seasonal

20 Jun
July 4th paper rosettes in red, white and blue.

One of the main reasons I love my Cricut is the ability to create great decorations for special occasions and for holidays.  I think this year more than ever we should celebrate the Birth of Our Nation so I created some fun 4th of July decor with Cricut.

I selected a couple of fun projects from Design Space and sized them to be made on 8 ½ x 11 paper.  Although I love my 12 x 12 paper packs, I think most people would like to be able to create projects using  8 ½ x 11 paper as it is more economical and easier to get in a variety of colors.  I usually use Recollections Paper Packs from Michaels and Neenah Astrobrights from Amazon.  However, feel free to resize the projects to make them as big as you want.

My files from Design Space can be found in the Resource Library.  Click below to access.  Also, make sure to watch the video at the bottom where I show you how to assemble these projects.

Click to Join Resource Library

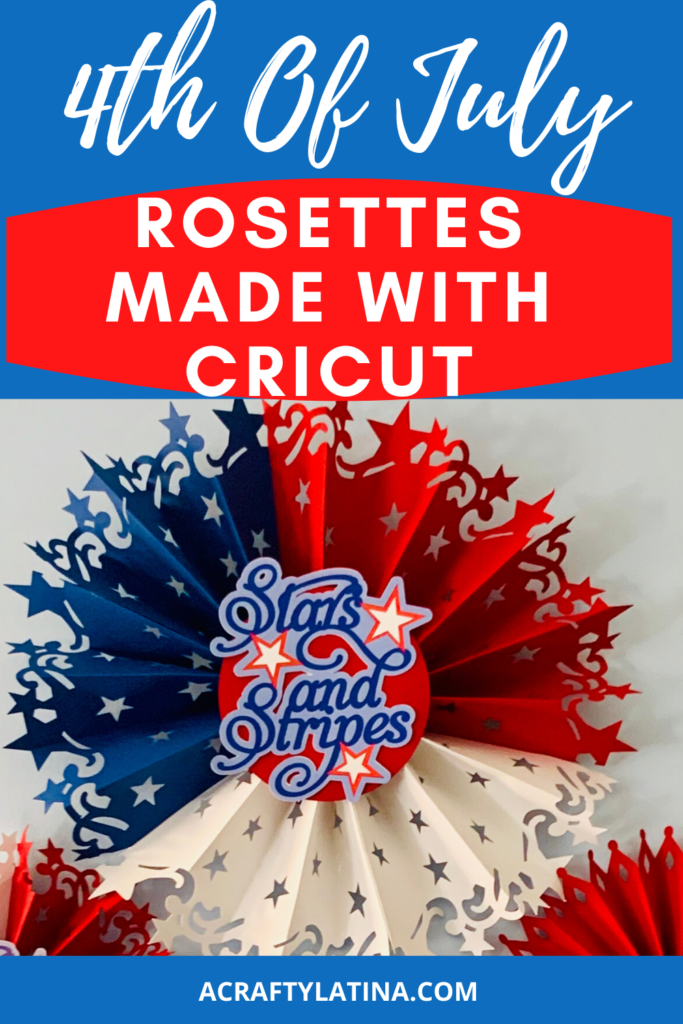
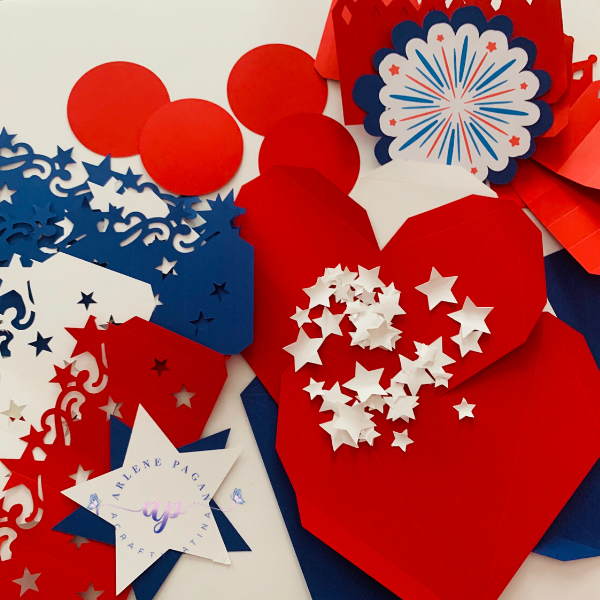
Stars & Stripes & Fireworks Rosettes

How fun and festive are these little beauties, right?  They take no time to make and will add such a festive touch to your fun 4th of July decor.  So let’s get started.

Supplies needed:

This post contains some affiliate links for your convenience; this means if you make a purchase after clicking a link I will earn a small commission but it won’t cost you a penny more it will just help me to continue to be able to provide you great tutorials and free projects. As an Amazon Associate I earn from qualifying purchases.

Cricut Machine – https://shrsl.com/2cfpv

Scoring wheel/stylus – https://shrsl.com/2co63

Blue cutting mat – https://amzn.to/2YuekGn

Red cardstock – https://amzn.to/3hYJw8z

Blue cardstock – https://amzn.to/2Bxoopb

White cardstock – https://amzn.to/37YH9Oj

Hot glue gun – https://amzn.to/3exLNWe

Gorilla Glue Sticks – https://amzn.to/3dr6C4c

If you use the Stars & Stripes Center or the Fireworks Center, these are Print then Cut projects, so you will also need:

Inkjet Printer – https://amzn.to/337fs5c

White Cardstock – https://amzn.to/37YH9Oj

If you need more information on the print then cut process, click below.
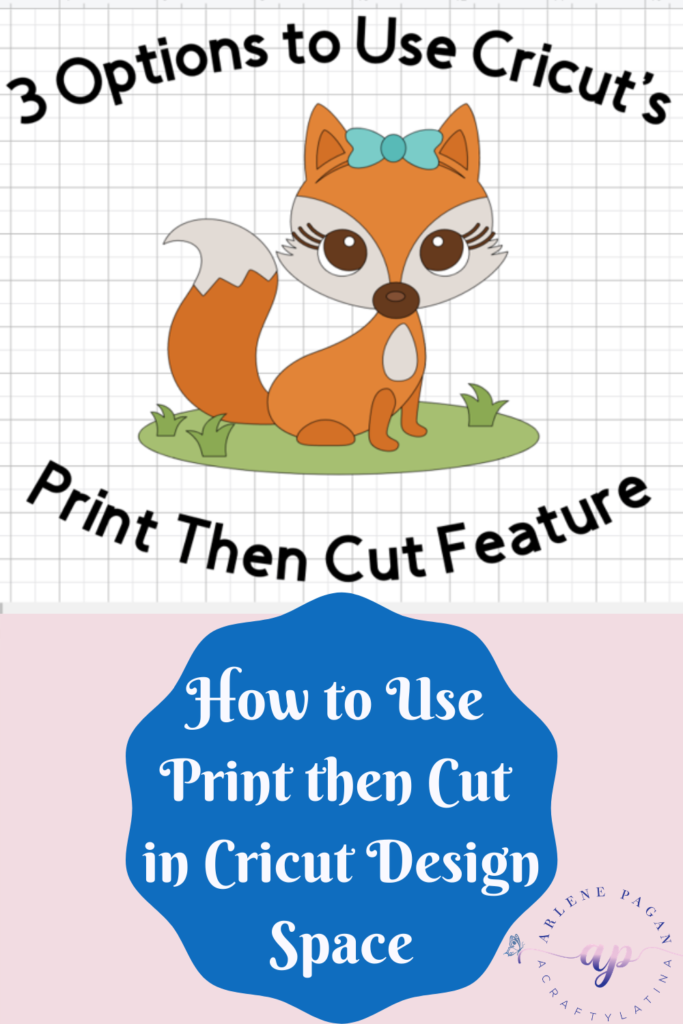
pinterest pin for 3 options to use print then cut feature with Cricut

On Design Space

Once you select the design space file for the project you want to make and open it, you will see all of the pieces necessary for that particular rosette.  

Stars & Stripes

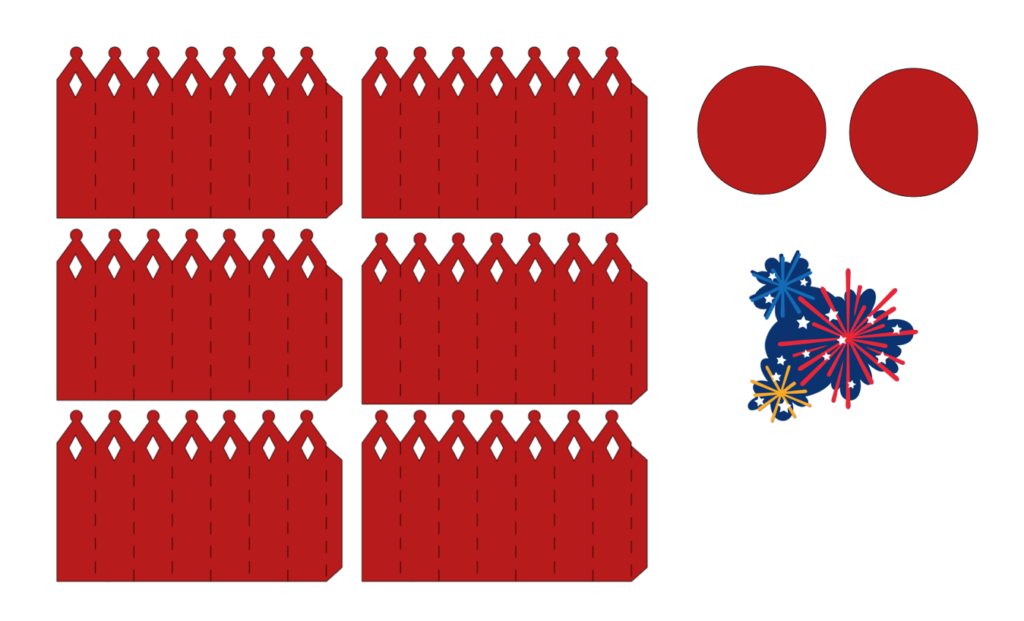
Image #M4738A on Desing Space – In this project you have 6 different rosette panels with the scoring lines already attached.  For the sample I created, there are 2 of each color and so that I could fit both on an 8 ½ x 11 piece of cardstock, they are sized at 8” x 4.565”.  You will also see 2 3” circles and the print then cut piece that will go in the center of your finished product, Stars and Stripes.  

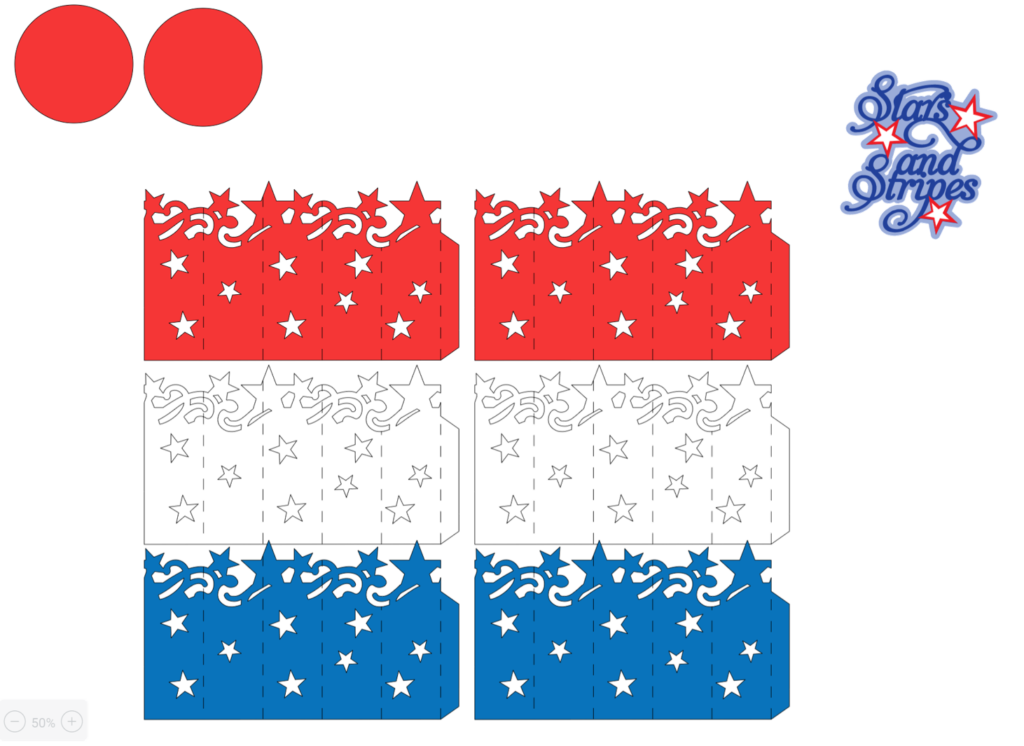
TIP:  I cut cardstock on the blue mat and use the cardstock+ setting on my machine.

Fireworks Rosette

This one is very similar to the one above with 6 panels; however, I made them all the same color.  For 2 panels to fit on one 8 ½ x 11 piece of cardstock, I sized them at 6.688” x 4.008”.  You should also have the 2, 3” circles and the fireworks piece that will go in the center.  The fireworks piece will also be a print then cut image.

cut outs to make paper rosettes from Cricut machine in red, white and blue paper

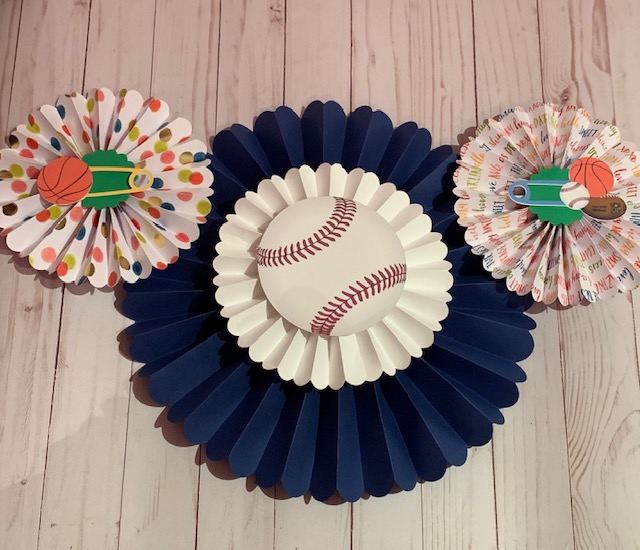
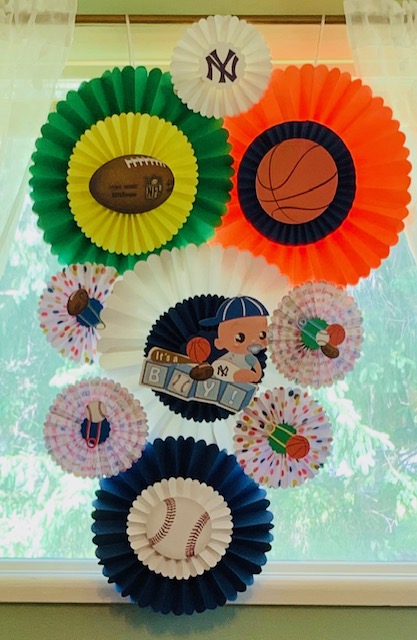
NOTE:  You don’t only have to make these as fun 4th of July decor with your Cricut, or just make in these colors, you can use any color cardstock, patterned paper, etc. for all parties.  Here are some I made for my son and his wife’s baby shower.

Assembling Rosettes

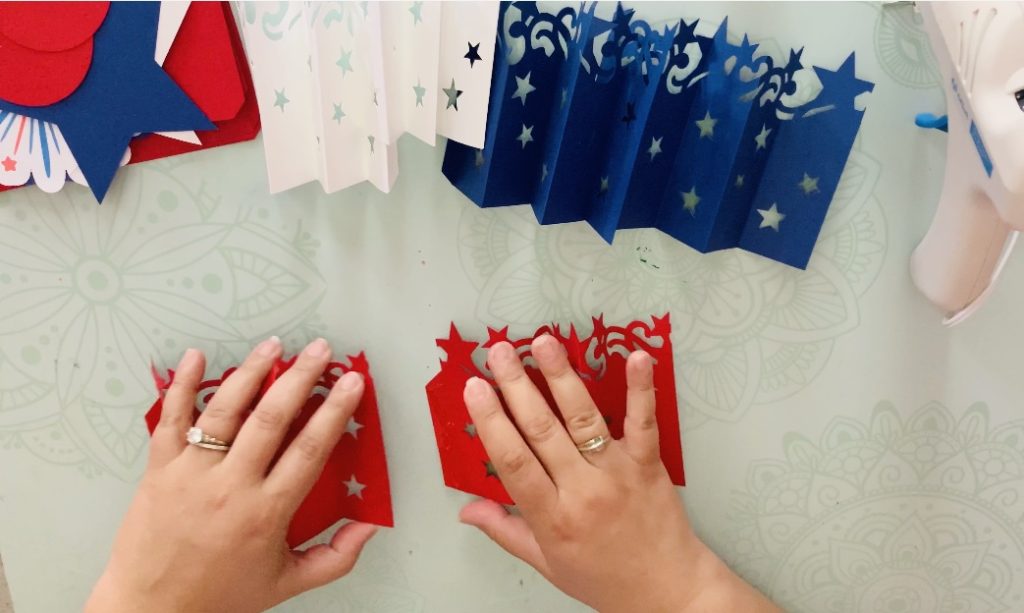
This process will be the same for both rosette styles.  Once you have all of the pieces cut out.  Take your first panel with the flat side facing the left and the small cut out edge to your right.  You will then start folding the panels from left to right like an accordion with the first fold going upwards.  Your scoring lines are there to guide you so this should be a fairly quick process.  Do the same with all 6 panels.

Panel for red rosette showing the accordian fold

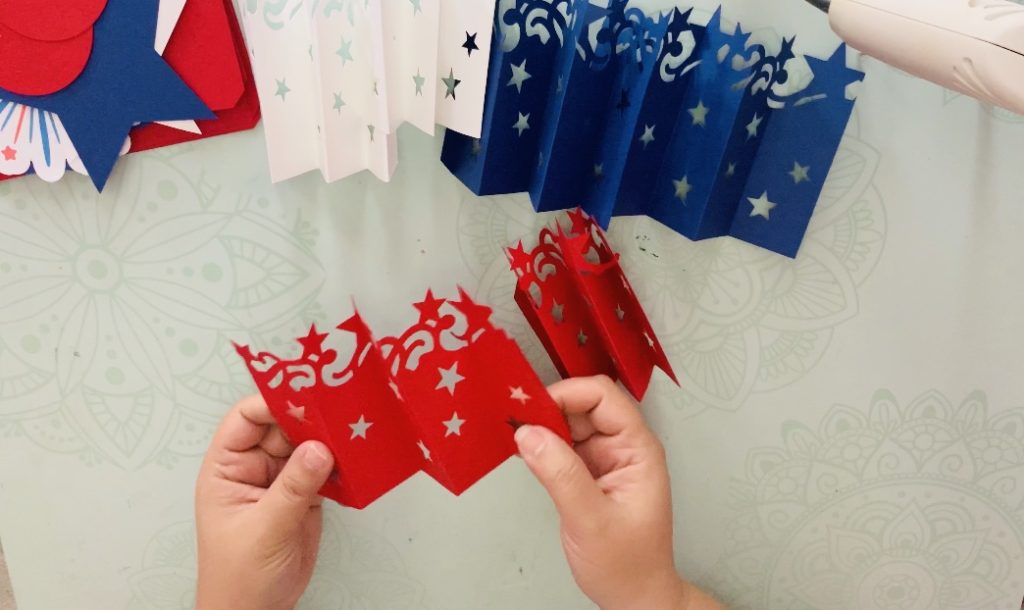
TIP: Please make sure to watch the video for demonstration.

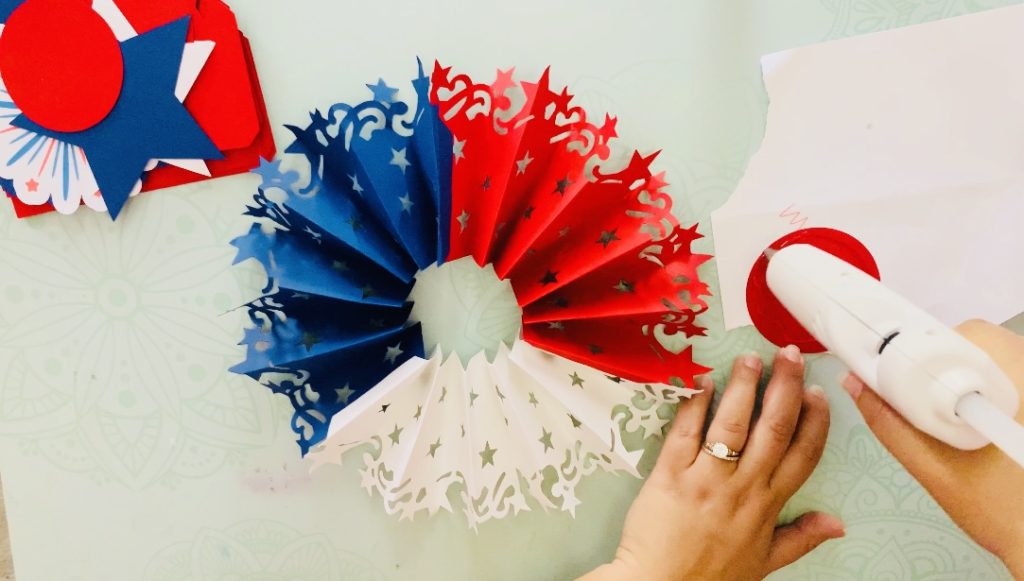
When you have all of the panels folded, you will then put some glue on the small flap on the left hand side and align the flat side of another panel on top of that so that the 2 ends meet.  You will repeat that process until you have joined all 6 panels making a circle.

red rosette panels demonstrating where to join with glue

Lay the circle on the table with the design at the top.  Start pinching the bottom corners together and try to get it to lay flat.  This process will take a while to master in the beginning, but once you figure out how to do it, it will be super easy.  The goal here is to get the bottom piece to join together so that the top fans out with the design facing outwards.  You should have a hole in the middle of the circle. 

rosette circle before placing the cut out circle to hold it in place

Final Touches

When you’ve made the rosette shape and it’s laying flat, put something light on top of it just to hold it in place.  If you let it go, it will disassemble and you will have to repeat the process again.  Put glue on the perimeter of one of the 3” circles.  Don’t put glue in the middle as that will be in the rosette hole and will not stick to anything and will just drip down onto your surface.

Squish (is that even a word?) the rosette together to make the hole small if you’d like, or if you want a bigger rosette, you can leave the hole up to 2.5” open.  The cut out circle must cover the hole.  Place it on top and hold down until the glue is cool to the touch.  Turn the rosette around and repeat the process on the other side.  The goal is to get the pleats to stick to the cutout center so that it stays open.

Rosette assembly with middle circle to hold piece in place

Your rosette should be very sturdy now and you can let it go.  The final step is to glue on the center of the front side of the rosette and hang it.  You can also use the 3D foam stickers to give it some dimension.

Hanging Options

There are many ways you can hang your rosettes. 

a) You can use fish wire, make a loop and glue to the back of the rosette

b) You can feed the fish wire through either the diamond pattern or one of the cutout stars and make a knot.

c) If placing on the wall, you can use double-stick tape, and

d) If you are making a backdrop design, you can use velcro to make sure they are sturdy.

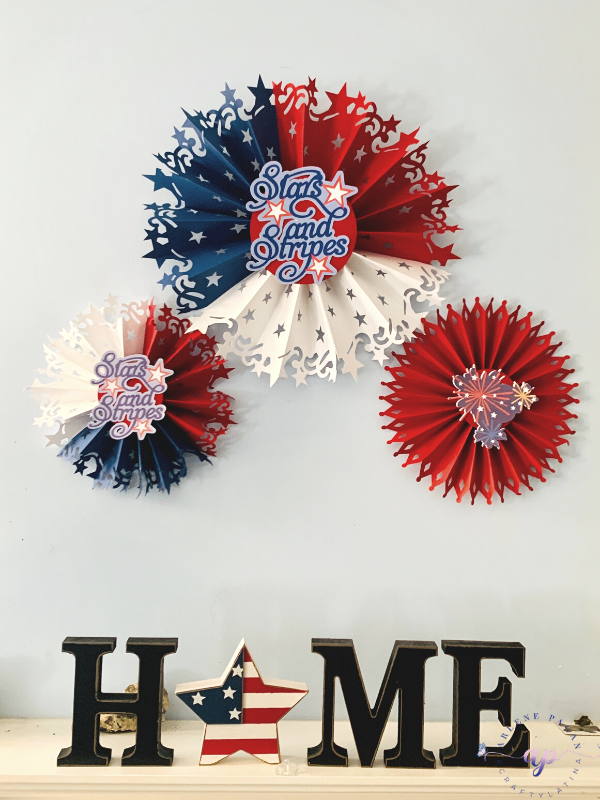
e) For the display below, I velcroed the pieces together and then used the fish wire to hang it.

Make sure to watch the video below so that you can see the assembly process.

I hope you enjoy making these as much as I did, remember you can use these and customize for any event or holiday.  Enjoy.

Click to Join ACraftyLatina

Remember to always love what you do and do what you love.

Arlene signature

Related Articles:

What is Cricut Access? – Is it Worth it and Do I Need it?

Make Stunning Banners With your Cricut

Tweet
Share
Pin391
Share
391 Shares

Subscribe

Sign up for the latest news and updates

Previous Post: « Make Dad’s Day Special With Your Cricut
Next Post: Get the little ones ready for Back to School »

Primary Sidebar

Let’s Connect

  • Email
  • Facebook
  • Instagram
  • Pinterest
  • YouTube

Meet Arlene

Welcome to ACraftyLatina! My name is Arlene González-Pagán and my passion is helping others. Read More…

Latest on Instagram


Love being creative? Then use @Canva to highlight
Love being creative?  Then use @Canva to highlight your tutorials for #cricut or any of your #diy #crafts #canvalove #acraftylatina #canva #canvasocialmedia #cricutdesignspace #cricutcontour #socialmediamarketing

Celebrated my birthday and needed to start with ce
Celebrated my birthday and needed to start with celebrating me #affirmations #htv #cricutmade #birthdayweekend

Celebrated my bday this weekend and started with t
Celebrated my bday this weekend and started with the best affirmation and attitude #psiloveme #acraftylatina #cricutmade #htv #birthdayweekend

Happy Mother’s Day! May you have a beautiful day
Happy Mother’s Day! May you have a beautiful day surrounded by love 💗 #mothersday #momlife #momsofinstagram #acraftylatina

Getting ready for #mothersday #momgifts #cricutmad
Getting ready for #mothersday #momgifts #cricutmade #makeitwithmichaels #diycrafts #acraftylatina

Get ready for #mothersday #momgifts #lovemom #cric
Get ready for #mothersday #momgifts #lovemom #cricutmade #madewithcricut #diycrafts #htvvinyl #acraftylatina


Follow on Instagram


Subscribe

Sign up for latest news and updates

Browse by Category

  • Cricut
  • Everything Cricut
  • Special Events
    • Holidays & Seasonal
    • Weddings
  • Sublimation
Love being creative? Then use @Canva to highlight Love being creative?  Then use @Canva to highlight your tutorials for #cricut or any of your #diy #crafts #canvalove #acraftylatina #canva #canvasocialmedia #cricutdesignspace #cricutcontour #socialmediamarketing
Celebrated my birthday and needed to start with ce Celebrated my birthday and needed to start with celebrating me #affirmations #htv #cricutmade #birthdayweekend
Celebrated my bday this weekend and started with t Celebrated my bday this weekend and started with the best affirmation and attitude #psiloveme #acraftylatina #cricutmade #htv #birthdayweekend
Happy Mother’s Day! May you have a beautiful day Happy Mother’s Day! May you have a beautiful day surrounded by love 💗 #mothersday #momlife #momsofinstagram #acraftylatina
Getting ready for #mothersday #momgifts #cricutmad Getting ready for #mothersday #momgifts #cricutmade #makeitwithmichaels #diycrafts #acraftylatina
Get ready for #mothersday #momgifts #lovemom #cric Get ready for #mothersday #momgifts #lovemom #cricutmade #madewithcricut #diycrafts #htvvinyl #acraftylatina
Great for Mother’s Day! #shadowbox #cricutmade # Great for Mother’s Day! #shadowbox #cricutmade #rolledflowers #rolledflowershadowbox #acraftylatina #madewithcricut #makeitwithmichaels #mothersday #mothersdaygift
Quick card with #cricutjoy #cricutjoycards #cricut Quick card with #cricutjoy #cricutjoycards #cricutjoycraft #cricut #easter #eastercards #diycrafts #acraftylatina
Fun Easter projects; blog link in bio #acraftylati Fun Easter projects; blog link in bio #acraftylatina.com #diycrafts #coloring #eastercrafts #craftingismytherapy #cricutmade #acraftylatina #easter
I’m loving the new #cricutoffset feature. #cric I’m loving the new #cricutoffset feature.  #cricutdesignspace #cricuttutorial #madewithcricut #acraftylatina #cricutcrafts #cricutstickers #diystickers #printthencut
Follow on Instagram
  • Home
  • Meet Arlene
  • Contact Me
  • Video Tutorials
wedding-invitations-with-your-cricut

Copyright © 2022 · Acraftylatina.com

Manage Cookie Consent
We use cookies to optimize our website and our service.
Functional cookies Always active
The technical storage or access is strictly necessary for the legitimate purpose of enabling the use of a specific service explicitly requested by the subscriber or user, or for the sole purpose of carrying out the transmission of a communication over an electronic communications network.
Preferences
The technical storage or access is necessary for the legitimate purpose of storing preferences that are not requested by the subscriber or user.
Statistics
The technical storage or access that is used exclusively for statistical purposes. The technical storage or access that is used exclusively for anonymous statistical purposes. Without a subpoena, voluntary compliance on the part of your Internet Service Provider, or additional records from a third party, information stored or retrieved for this purpose alone cannot usually be used to identify you.
Marketing
The technical storage or access is required to create user profiles to send advertising, or to track the user on a website or across several websites for similar marketing purposes.
Manage options Manage services Manage vendors Read more about these purposes
View preferences
{title} {title} {title}