ACRAFTYLATINA

  • Home
  • Special Projects
    • Weddings
      • Wedding Table Numbers
      • DIY Wedding Invitations with your Cricut
      • Wedding DIY Countdown Sign – ?? Until I Do
      • Wedding Planning Checklist
      • Abide by Second Wedding Etiquette; Says Who?
      • I Do in Las Vegas
      • Easy Cricut Wedding Projects
    • Sublimation
      • Sublimation to Expand Your Crafting Experience
    • Holidays & Seasonal
      • Make Dad’s Day Special With Your Cricut
      • Create Layers with Contour in Cricut Design Space
      • Fun Projects for Valentine’s Day
      • Home Decor for the Holidays
      • Custom 3-layer Christmas Ornament in Cricut Design Space
      • Christmas Countdown with Cricut
      • Freebies for your Holiday Decor with Cricut
      • Fun 4th of July Decor with Cricut
      • Mother’s Day Card With Your Cricut Joy
      • Mother’s Day Flower Shadow Box
      • Happy Spring Wreath Floral Display
      • Good Fortune This Valentine’s Day
      • Let Cricut Help Color Your Valentine
      • Love Mason Jar
      • Cricut-made Christmas Dish Towels
      • Personalized Christmas Stockings with Cricut
      • Santa’s Milk & Cookies Plate
      • Ornament in Memory of a Loved One
      • Glitzy Holiday Gift Tags
  • Everything Cricut
    • Don’t Be Afraid of Your Cricut, It’s Friendly
    • How to Use the Cricut Offset Feature
    • Top 10 Tips for Cricut Design Space
    • Drawing with Infusible Ink Pens & Markers
    • Create Custom Stickers Using Your Cricut
    • Back to School
    • Cricut Infusible Ink – What it is and How to Use It
    • Make Beautiful Flowers with Cricut Design Space
    • Family Birthdays Knockout Design
    • Unbox & Setup the New Cricut Joy
    • Write With Your Cricut
    • Upload Fonts To Use In Cricut Design Space
    • Mini but Mighty EasyPress
    • Uploading Your Image from PC to Design Space
    • How To Use Print Then Cut in Cricut Design Space?
    • How to Use Weld in Design Space
    • How to use Cricut’s Design Space Slice Feature
  • Video Tutorials
  • Favorite Crafting Supplies
  • Meet Arlene
  • Contact Me
  • Resource Library

Glitzy Holiday Gift Tags

Holidays & Seasonal

1 Feb
3 gift tags made with cricut

In a few simple steps you will impress family & friends.  So Let’s get Crafting!

What you will need:

Cardstock paper of your choice.  I usually purchase the Christmas paper pads at Michaels.  A mix of patterns and shimmer is always nice

1. Cricut Machine

2. Cricut pen colors of your choice

3. Double-sided tape or glue

4. Ribbon, string or any other embellishment you like

5. Standard Grip Mat (hint – it’s Green)

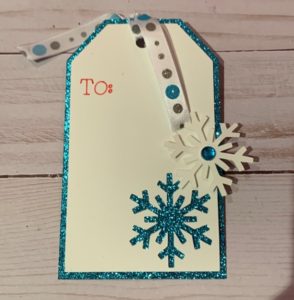
Ice Blue Snowflake Tag

blue and white glitter gift tag with snowflakes

The Cricut Classic Font Cartridge has gift tag shapes you can use; however, if you want to create your own shape, follow the steps below; IF you already have the tag shape, start with Step 7.

1. Open a new Cricut Project

2. Insert the square and hexagon shape

3. Resize the square to W 3 and H 5

4. Resize the hexagon to W 3 and H 2

5. Now line up the widest point of the hexagon to the top line of the rectangle

6. Weld the images

7. Duplicate your tag shape

8. Change the color of one of the shapes to distinguish between which will be the background and which will be upfront.

9. Resize the front shape to W 2.764 and H 4.768

10. Search Design Space for the snowflake you want to use. I used a snowflake from the Paper Christmas cartridge

11. Place the snowflake where you would like it to be; highlight both the shape and snowflake together and hit slice

12. Then remove the snowflake image and the sliced snowflake; you should now have the shape with a snowflake cut out at the bottom.  If you put your 2 pieces back together, the back color should now come through

13. Insert a circle from shapes, resize to .25 and center at the top of the front shape with the snowflake cutout

14. Highlight the shape and circle together and hit slice; **remove only the top extra circle that was cut out.  Move the front shape out of the way and you should have the back shape with a circle still at the top. Highlight both the circle and back shape and slice.  Remove the cutout circles.

15. Insert the To: text on the front shape and select the color matching the Cricut Pen you will use to write it; I chose red.  Make sure you select a writing font; each font will indicate whether it’s a writing font as well as a cutting font. Also make sure at the top you change

16. Highlight the shape and your text and hit attach; this will make sure it writes in that location

Voila! Once you hit Make It, you should see 2 mats representing the 2 color backgrounds you chose for your shapes.

Ornament Gift Tag

This is a simple ornament gift tag with a little snowflake pizzaz.

 1.You can use gift tag from the Holly & Ivy cartridge or you can make your own shape.  See video for instructions. My ornament is 5” in height.

2. Click on images and find the snowflake you would like to use and resize to fit inside your ornament; mine is 3.5” height – TIP – if you resize your height the width with automatically resize as well and vice versa

3. Duplicate your snowflake and resize to be 1 ½” smaller than the height of your large snowflake.  Mine is 2”

4. Click on shapes and insert a circle

5. Insert text and type To:  I use A Child’s Year Cricut Font.  Make sure you have it set to writing and select the pen color you would like.

6. Click on the circle and the To: and group them together.  Then highlight then again and click on attach so that you are sure the writing will be on your circle.

7. Place the circle on the side of your small snowflake and resize; my circle is 1.708”

Oh Joy! A great fun, festive gift tag

Glitzy Reindeer

Now you can use the same steps we used to create the first gift tag and resize to make new gift tags. This tag is Width 4” and Height 4.678”.  Here’s a fun, easy, glitzy reindeer.

1. Make sure to cut out the circle for your ribbon

2. Click on images and find a reindeer you like

3. I added a circle from shapes and cut out a red nose for it

4. I decided to use a pattern paper for background so I couldn’t write directly on it.

5. You can create a banner shape and write on that and glue it onto the background paper.  **Make sure to change to writing and pick the color based on the pen you will use

6. Highlight the word To: and the shape and group; highlight them again and click attach.

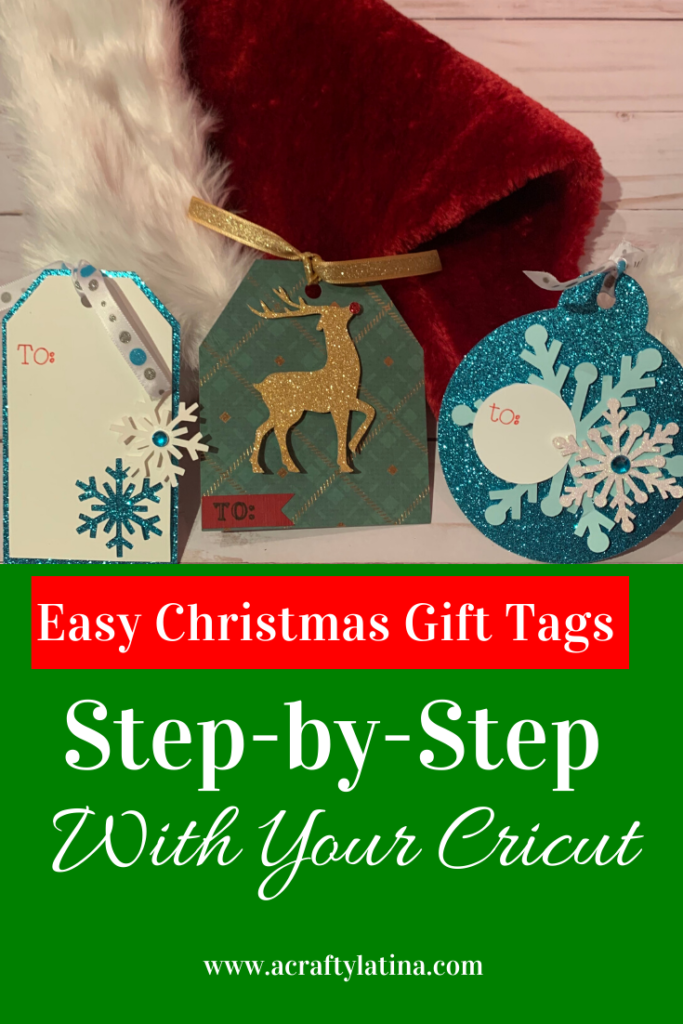
And That’s it — 3 simple yet fun gift tags that will add a little personal touch to all of your gifts.

Remember, always Do What You Love, Love What You Do. If you have any questions, always feel free to contact me.

Related Articles:

How to Personalize Door Mats With Your Cricut

Make Cake Toppers With Cricut

Tweet
Share
Pin
Share
0 Shares

Subscribe

Sign up for the latest news and updates

Previous Post: « Ornament in Memory of a Loved One
Next Post: Uploading Your Image from PC to Design Space »

Primary Sidebar

Let’s Connect

  • Email
  • Facebook
  • Instagram
  • Pinterest
  • YouTube

Meet Arlene

Welcome to ACraftyLatina! My name is Arlene GonzΓ‘lez-PagΓ‘n and my passion is helping others. Read More…

Latest on Instagram


Celebrated my bday this weekend and started with t
Celebrated my bday this weekend and started with the best affirmation and attitude #psiloveme #acraftylatina #cricutmade #htv #birthdayweekend

Happy Mother’s Day! May you have a beautiful day
Happy Mother’s Day! May you have a beautiful day surrounded by love πŸ’— #mothersday #momlife #momsofinstagram #acraftylatina

Getting ready for #mothersday #momgifts #cricutmad
Getting ready for #mothersday #momgifts #cricutmade #makeitwithmichaels #diycrafts #acraftylatina

Fun Easter projects; blog link in bio #acraftylati
Fun Easter projects; blog link in bio #acraftylatina.com #diycrafts #coloring #eastercrafts #craftingismytherapy #cricutmade #acraftylatina #easter

TGIF my friends! Make the most of your day and rem
TGIF my friends! Make the most of your day and remember, your uniqueness is your greatest asset. πŸ₯° #beyou #youruniquestyle #confidence #tgif #acraftylatina

Happy 1st day of Spring. A season of new beginnin
Happy 1st day of Spring.  A season of new beginnings πŸ¦‹ #springisintheair #firstdayofspring #newbeginnings #acraftylatina


Follow on Instagram


Subscribe

Sign up for latest news and updates

Browse by Category

  • Cricut
  • Everything Cricut
  • Special Events
    • Holidays & Seasonal
    • Weddings
  • Sublimation
Celebrated my bday this weekend and started with t Celebrated my bday this weekend and started with the best affirmation and attitude #psiloveme #acraftylatina #cricutmade #htv #birthdayweekend
Happy Mother’s Day! May you have a beautiful day Happy Mother’s Day! May you have a beautiful day surrounded by love πŸ’— #mothersday #momlife #momsofinstagram #acraftylatina
Getting ready for #mothersday #momgifts #cricutmad Getting ready for #mothersday #momgifts #cricutmade #makeitwithmichaels #diycrafts #acraftylatina
Fun Easter projects; blog link in bio #acraftylati Fun Easter projects; blog link in bio #acraftylatina.com #diycrafts #coloring #eastercrafts #craftingismytherapy #cricutmade #acraftylatina #easter
TGIF my friends! Make the most of your day and rem TGIF my friends! Make the most of your day and remember, your uniqueness is your greatest asset. πŸ₯° #beyou #youruniquestyle #confidence #tgif #acraftylatina
Happy 1st day of Spring. A season of new beginnin Happy 1st day of Spring.  A season of new beginnings πŸ¦‹ #springisintheair #firstdayofspring #newbeginnings #acraftylatina
Contour in Cricut Design Space is a great way to c Contour in Cricut Design Space is a great way to create layered images.  Check out my new blog post; link in bio. #cricut #cricutmade #cricutdesignspace #cricuttutorial #cricutcontour #cricutforbeginners #acraftylatina #cricutmademedoit #cricutmade #stpatricksday
Monday hustle! Get up and show up. #mondayhustle Monday hustle! Get up and show up.  #mondayhustle #inspiration #mondaymotivation #acraftylatina
Are you ready for Santa? #cricutchristmas #cricut Are you ready for Santa? #cricutchristmas #cricut #cricutmade #oreo #cricutcrafts #vinylprojects #cricutaddict #acraftylatina #cricut
A little something for me 😊 #cricut #cricutmade A little something for me 😊 #cricut #cricutmade #cricutcrafts #htv #monogram #acraftylatina #makeupbag #easypress #cricuteasypress
Follow on Instagram
  • Home
  • Meet Arlene
  • Contact Me
  • Video Tutorials
wedding-invitations-with-your-cricut

Copyright © 2022 Β· Acraftylatina.com

Manage Cookie Consent
We use cookies to optimize our website and our service.
Functional cookies Always active
The technical storage or access is strictly necessary for the legitimate purpose of enabling the use of a specific service explicitly requested by the subscriber or user, or for the sole purpose of carrying out the transmission of a communication over an electronic communications network.
Preferences
The technical storage or access is necessary for the legitimate purpose of storing preferences that are not requested by the subscriber or user.
Statistics
The technical storage or access that is used exclusively for statistical purposes. The technical storage or access that is used exclusively for anonymous statistical purposes. Without a subpoena, voluntary compliance on the part of your Internet Service Provider, or additional records from a third party, information stored or retrieved for this purpose alone cannot usually be used to identify you.
Marketing
The technical storage or access is required to create user profiles to send advertising, or to track the user on a website or across several websites for similar marketing purposes.
Manage options Manage services Manage vendors Read more about these purposes
View preferences
{title} {title} {title}