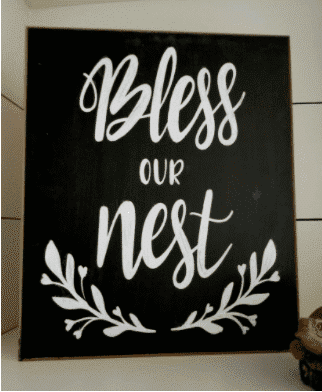
Cricut is a very helpful service which you can use to create some fantastic and attractive artworks. You can customize things according to your liking and decorate several things just how you would like to.
The convenience offered to you by Cricut is second to none and since we’ve discussed plenty of things about Cricut in the past, we shall be looking at another project today. For today, our focus shall be on chalkboard signs. We can use Cricut to make attractive and beautiful chalkboard signs and today we’ll be telling you how!
How to Use a Cricut for Chalkboard Signs
A chalkboard sign is going to be a great addition to your room and you could also use it for any events if you want to. So, all in all it’s going to be worth the hard work that you’ll be putting into this chalkboard.
In order to make a chalkboard sign, you can use a lot of creative SVG files which are available in different Cricut media libraries all on the internet. The things you will require for this chalkboard sign are chalkboard paint, vinyl or contact paper, transfer tape, piece of wood, chalk markers, and of course Cricut.
The first thing that you’ll need to do is download a file and upload it to Cricut Design Space. This could be an SVG file that you would like to use. Since you’re making a chalkboard then it could be anything you would like to put on the board like a notice or if it’s a signboard for an event then you could design it accordingly as per the event.
Next, cut the file out on contact paper or vinyl with a light grip mat. I used contact paper from Walmart for this project since it wasn’t a very intricate design. I cut it out using the setting right before Vinyl. Weed the wording out of the design since you will be using it as a stencil.

For the board, cover edges if needed with blue paint. Paint a layer of chalkboard paint on the board and let it dry for one hour and then proceed to paint a second coat on it. For the board, you can cover edges if needed with pain. Paint a layer of chalkboard paint on the board and let it dry for one hour and then paint a second coat.
Let the chalkboard paint cure for 24 hours and then rub a piece of chalk all over the paint to condition it to stick to the board. After this step, apply the vinyl stencil to the board with transfer tape. Then use liquid chalk markers to paint in the wording and remove the stencil off of the chalkboard and then you’re finally done making your chalkboard. That wasn’t so hard now, was it?

Making a chalkboard sign is great fun. Since you’ll get to make it for the first time after following these steps, you can continue to make more of these if you like it. You can even make chalkboards signs on glass. These could include large as well as small frames but deciding the size of the stencil will be according to the size of the board. Though there is a little difference in the process when doing so with glass.
Now that you know how to make a chalkboard sign on your own, make sure to have fun while making yours because that is the most important part while you make one!

