Creativity can hit unimaginable levels when you’re working with Cricut. It is a service that makes you want to bring out the innovator inside of you with utmost force. And all around the house, there is something you can work on or use in Cricut particularly well. As for today, we shall be looking at a specific area in the house where you can put your Cricut works to best use and that part of the house is the kitchen.
Today we shall be telling you ways to make a DIY Kitchen towel by Cricut. This is an extensive process but if you follow the steps carefully then you’ll get done making your favorite towels without any hassle. Let us begin.
The problem of using a traditional iron on your iron-on projects is that the iron has uneven heat so the iron-on vinyl doesn’t attach completely in some of the areas which lead to peeling over the course of time. With the Cricut EasyPress, an evenly heated plate and simple control make the Cricut EasyPress the best way to get seamless transfers that last on your kitchen towel instead of coming out with every wash. We hope you’re free of worries now because the towel you’re going to be making is going to last for a long time!
Process On DIY Kitchen Towel with Cricut
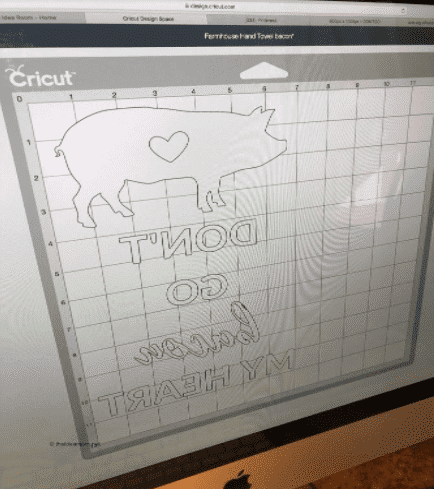
The first thing you will need to do is to make sure you mirror the image so that it is cut correctly to iron-on with the iron-on material. You will need to place the shiner side of the material on the light grip cutting mat that is going to help you cut out the design which you’ll be willing to use onto your towels. After this, peel the layer off of the cutting mat and weed out the material that you don’t want as a part of your design.
While you are peeling out the excess material, make sure your Cricut EasyPress is being warmed up in the back. The ideal setting for the Press is to set it to 295 degrees for regular iron-on material and set it at this temperature for 35 seconds. Make sure to use a clean towel to go under the heat press and be sure to use it on a surface that won’t be affected by the heat of the press. Heat up the material before you add the iron.
Make sure your hand is firm after which you’ll hold the EasyPress over the material very firmly but you don’t need to press down really hard on it. Move it over the material so that every part of your design is heated for 35 seconds. After you’re done with the pressing, peel away the plastic coating carefully! Once the plastic coating is removed then it is time to give yourself a pat on the back because you just made a kitchen towel all by yourself and you should be very proud of yourself.

Things to Remember
Some things which you need to remember about making a DIY kitchen towel is to make sure to choose the right design for yourself at first because there are no do-overs here. Once you print the design on the towel there is no going back and if you want another design then you will need to start off from scratch with an entirely new towel. The second most important thing to remember is to divide the amount of heat on each part of the towel carefully. Don’t just put the Cricut Heat Press on the towel and forget it. That is going to mess up your work and might also burn the fabric of your towel!

