Ever since Cricut has blown up, one thing that has picked up quite a lot of traction is Cricut vinyl cups. These cups are loved for the reason that they can be customized to the person’s liking and a further addition to the cups can also be made if a person wants to. There is a step-by-step process that will be discussed in order to make this entire procedure easy for you. You can easily put together a Cricut mug together all by yourself as we are here to simplify the entire process for you.
These Cricut mugs are so adorable and perfect for any level of craft. Even if you haven’t worked before with vinyl then don’t worry as this project is easy to do and you can do it without any hassle. Once you get the hang of this, you can use this method to give a gift to your friend or a loved one. Every one of us needs a good coffee cup to drink our daily beverage. These mugs are a cute and thoughtful gift to give to anybody. We’re pretty sure they’re going to love it when they come to know you’ve made the entire thing yourself.
Cricut Vinyl on Cups
Here are some steps for this,
Step – 1: Finding a Design
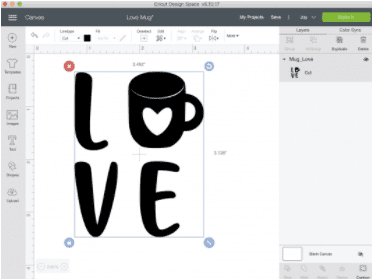
For the first step in this process, you will need to find a design for your Cricut mug. You can check different resource libraries for any graphic or text you want to get printed on your mug. If you plan to cut the vinyl decals out on your cutting machine then upload the file to your design software with the Cricut Design Space.

Step – 2: Cut Your Vinyl
For the second step, you will need to set your material. Browse on Material Settings and search for permanent vinyl. Place your adhesive vinyl color up on your cutting mat. Make sure the fine-point blade is loaded into your Cricut cutting machine, then load the mat in. When you press the button it was begin to start and it will only take a minute or so to cut the faces. When you are done with the cutting, flip the mat over onto your work’s surface and peel it away from the vinyl carefully.
Step 3: Weed Your Vinyl
Once you cut out your vinyl, you will then proceed to weed it. It removes all the extra bits that you don’t want to transfer to your mug. After the vinyl is weeded, you need a piece of tape to transfer your entire design to your mug.
Step 4: Applying Vinyl
Finally, once you have the vinyl in your hands, it is now time to apply the vinyl on a mug. But before you apply the vinyl to the mug’s surface, it is important to clean that surface with IPA (isopropyl alcohol). The IPA will help clean the surface as quickly as possible and help get out the dirt. After cleaning it, the cup should look flawless after which the Vinyl will be applied to it. It will then make sure the vinyl decals stick and stays stuck permanently.
Step – 5: Apply Sealer
Finally, to apply the finishing touch, permanent adhesive vinyl is going to hold up the vinyl. But make sure to not keep washing the object every time since the vinyl came out immediately with constant washing. Over time, your vinyl will begin to peel and if you plan to clean mugs regularly in dishwater then you can do so for a better result.
Once you follow these steps in the right order without missing any major detail, you will end up becoming the king of customizing cups because, with Cricut, it is super easy to carry out your activities and make customizable products all by yourself!

