I don’t know about you but I’ve realized that Cricut has so many features that are not as popular. I don’t know if it’s because people don’t need them or don’t know how to use them. But if that’s the case, I’m here to teach you how to create layers with contour in Cricut Design Space.
Get Your Base Image
I don’t know what it is this year, but I have a fascination with gnomes. Since it’s almost St. Patrick’s Day, I’m going to use this gnome image that I downloaded for FREE from Design Bundles. Click below and get your copy while it’s still available.
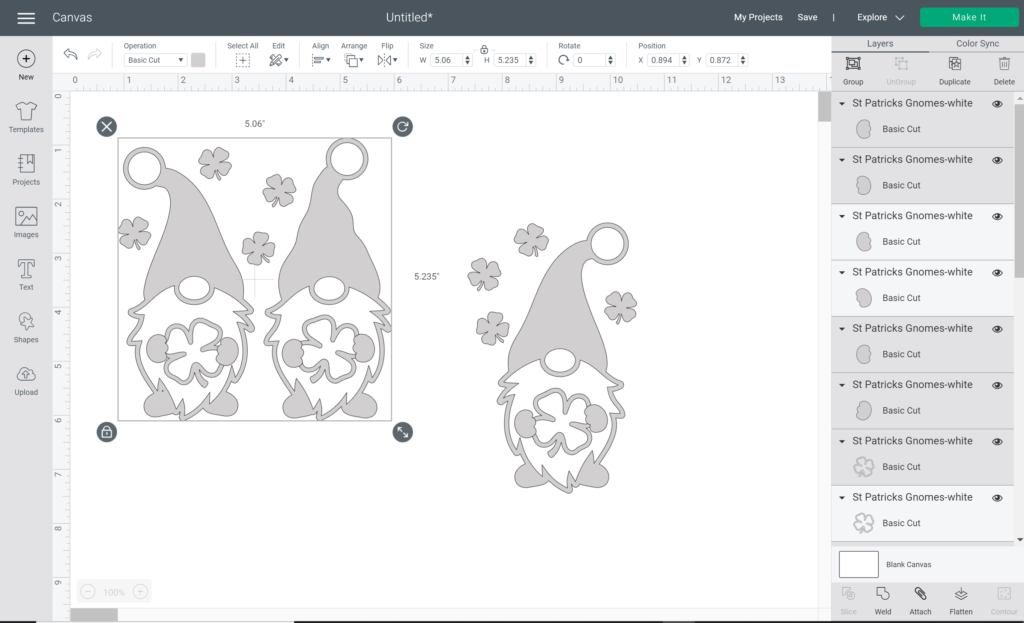
As you can see there are 3 grey gnomes which are all 1 layer. I’m only going to focus on the one all the way to the right. So, I will ungroup the image and just either move the others out of the way or delete them all together. You should now have just the gnome, the little shamrocks around him, in his hands and his hands.

Create First Layer
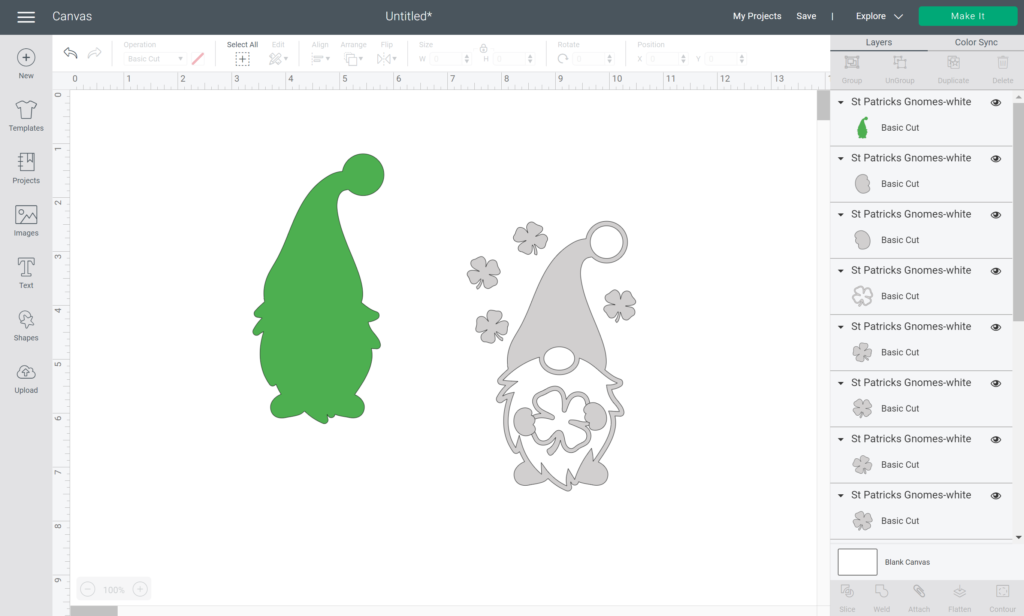
Well, here’s where the fun starts and we get to create layers with contour in Cricut Design Space. Go ahead and click on the gnome and duplicate him. We will focus on 1 image at a time. Go ahead and click on the image and you should see the contour feature available on the bottom right of your PC or when you hit Actions on your app, you should see Hide Contour. Go ahead and click on the nose, beard and pom pom circle at the top of his hat. You should just have the silhouette remaining. Go ahead and close out of contour and go back to your Canvas. I made my silhouette green for St. Patrick’s Day.

Create Second Layer
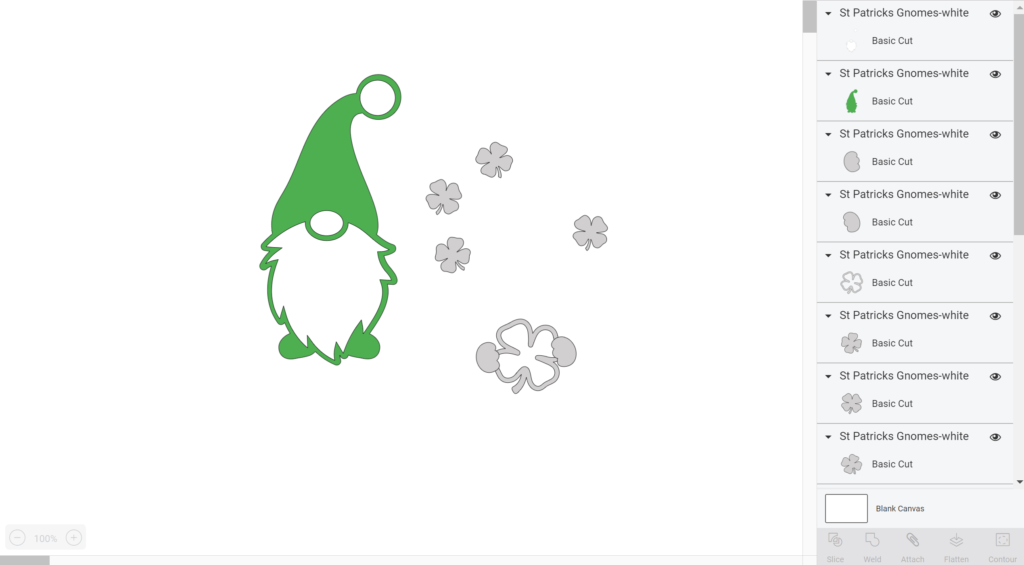
To make your second layer, just click on the other grey gnome and hit contour again. Now you do the opposite, click on the silhouette to hide and keep the nose, beard and pom pom at the top of the hat. Close out of contour and go back to your Canvas. Make that layer white.
You should now have 2 gnome layers; the color silhouette and the white layer with the beard, nose and pom pom. Align the white over the green and there you have your gnome!
Now you know how to create layers with contour in Cricut Design Space.

Finish the Project
Go ahead and follow the same steps with the shamrock he’s holding.
- Duplicate
- Click on copy and go to Contour
- Hide the middle part
- Go back to Canvas and change silhouette color to match the gnome silhouette color
- Click on the shamrock copy
- Go to Contour
- Hide the back
- Go back to Canvas and change the color of the middle part
The last steps are to change his hands to the color of the silhouette and change the little surrounding shamrocks to whatever color you choose. You can also add text and customize it.
Additional Projects
I hope you found it super simple to create layers with contour in Cricut Design Space. I can only imagine how many fun projects you can now do by creating layers and adding dimension to your images.
These are some other fun project files I have available in my Resource Library. Make sure to click below to gain access.
Related Articles:

This post may contain affiliate links which may provide me with a small percentage of purchased items. This does not affect the price of your product but does allow me to continue to provide you great content and free resources.


