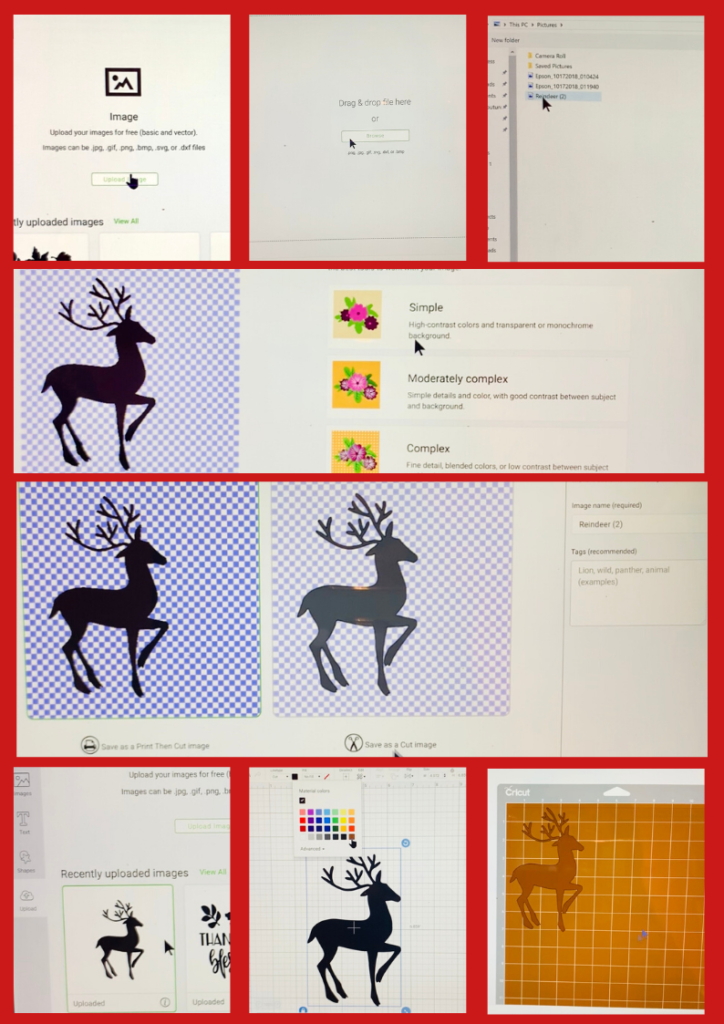
There are so many great images available to you in Design Space; however, sometimes you have a custom image that you wish you could use in your project. In just 10 easy steps your own image can be uploaded into Design Space and part of your creation. Here we go!
1. Open a new project in Design Space
2. Click on Upload on the bottom left panel
3. Click on Upload Image – note that your image can only be .jpg, .png, .gif, .bmp, .svg, or .dxf
4. Click on Browse and find your image in your computer files
5. Click on open
6. Select the option on the right, depending on the complexity of your image. Usually simple is all you need to use.
7. Hit continue
8. Save as a Cut Image; the right selection box
9. Insert into your project
10. Resize and That’s It!

I’ve also included a brief video showing the steps above in case you rather view the steps.
Please remember that unless you use images that you have created, please make sure you have permission to use for either personal or commercial use. There are plenty of sites on the web with free SVGs for personal use and for commercial use. LoveSVG is a site that I usually use to find great SVG files and there are great free ones as well.
As always, I’m here to help answer any questions you may have. Until next time, remember to Do What you Love, and Love What You Do!


