
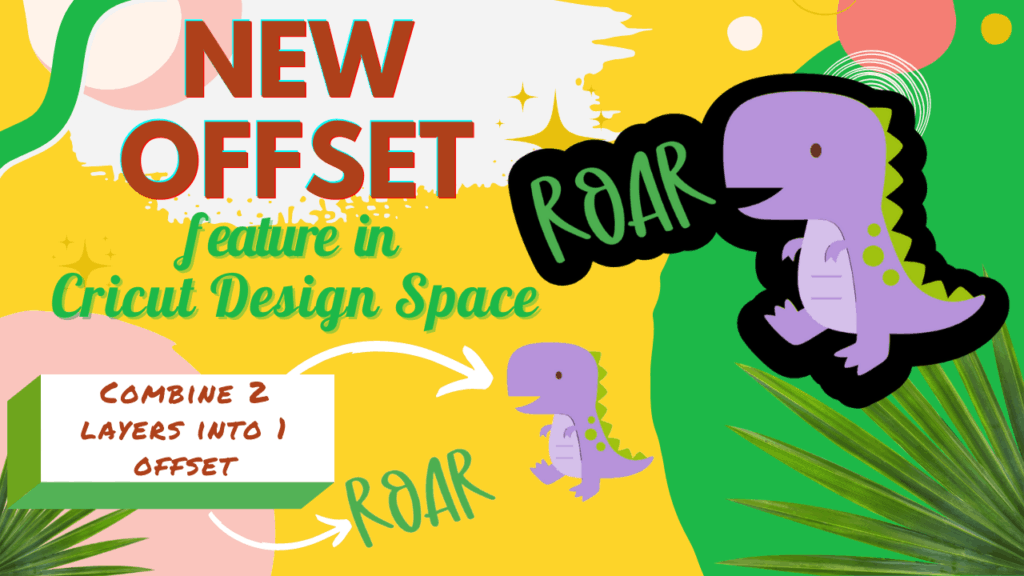
Do you have any idea how long I’ve been waiting for this feature?? I had found every work around to make it work, but it took forever. But now, we can create shadow text and images right from Cricut Design Space. So let me show you how to use the Cricut offset feature.
Oh, I created a video demo for you below so if you just want to see it, scroll down..BUT, if you want to know what is and what’s not compatible, then read on.
Is it Compatible with your Device?
First, it’s only available on Desktops right now. I know, I know, many of us work on tablets and iphones. I’m crossing my fingers it’s going to be included at some point.
Second, you need to be running Windows 10 (64-bit only) and higher or macOS 10.15 and higher. Also, this will only work on the New Canvas style. So make sure that’s what you have. If you’re not sure, here’s how to check.
- Select Menu (that’s the 3 _____ at the top left)
- Go to Settings
- Scroll to the bottom and make sure Canvas Style New is selected
And that’s it, now let’s get started so you can do it too.
How to Offset an Image
Go ahead and upload or open your document with the image you want to do the offset for.
Tip: If there are multiple layers, make sure to group them first.
Select the image and you should see the Offset feature become highlighted at the top of the toolbar. You will see several options appear.
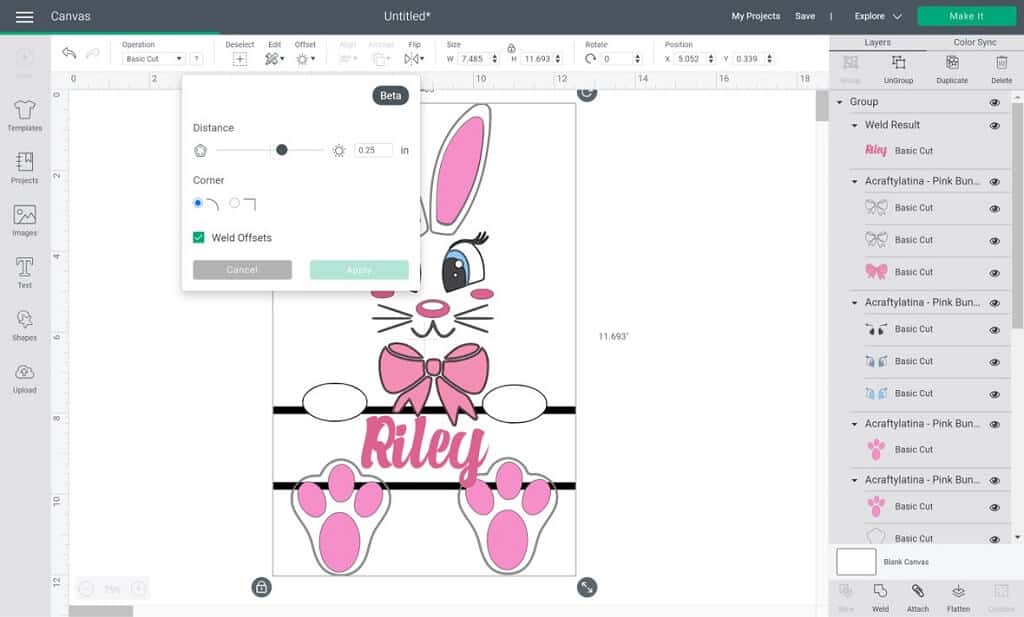
In the offset menu you will see the distance bar. That basically means how far out you want the offset to be from either your image or text. It usually starts at 0 and as you move it to the right it gets bigger and farther from the original image. I find that .067 worked well for this sticker I was doing.
The corner selection is whether you want rounded corners or more squared corner. I selected the square corner just to see what happened for this image, but it didn’t change.
Once you are happy with your selection, click on apply and your image should have a black shadow behind it. Select the new black layer and change it to whatever color you want. I changed my Canvas color to grey so that you could see the contrast in the layers.
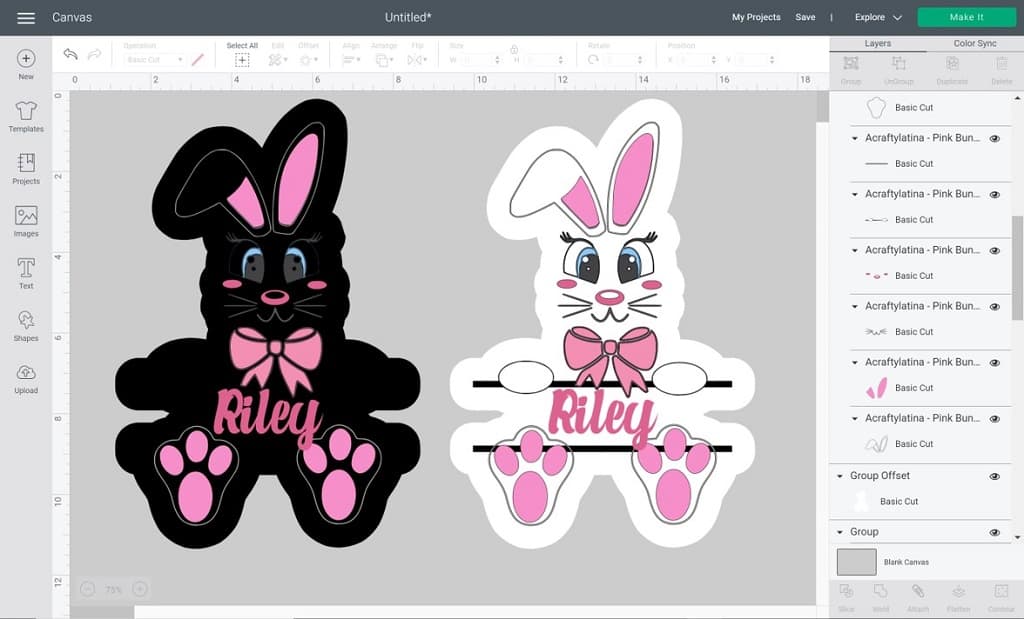
Now that’s how to use the Cricut offset feature for an image. But is it the same for text?
Offset Feature for Text
Type out the text you want to create the offset layer for. Click on the text and the offset features should come up just like for an image.
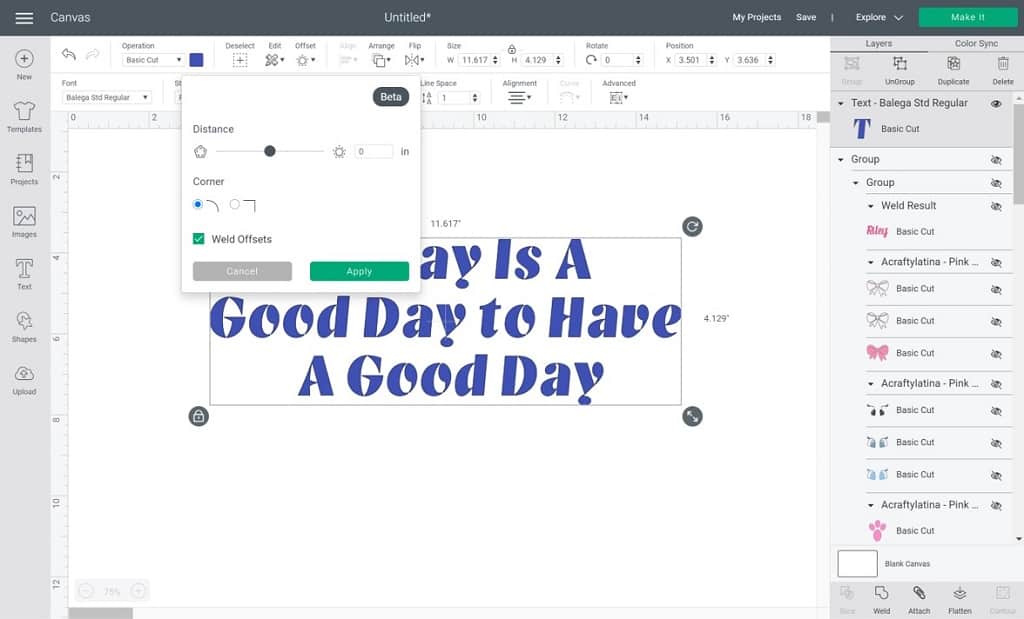
Now as you start increasing, notice that there may be some spaces between your letters. Unless you want your Cricut to cut out all of those little gaps in the middle of letters and spaces, then make sure you increase the offset to just enough to close the gaps.
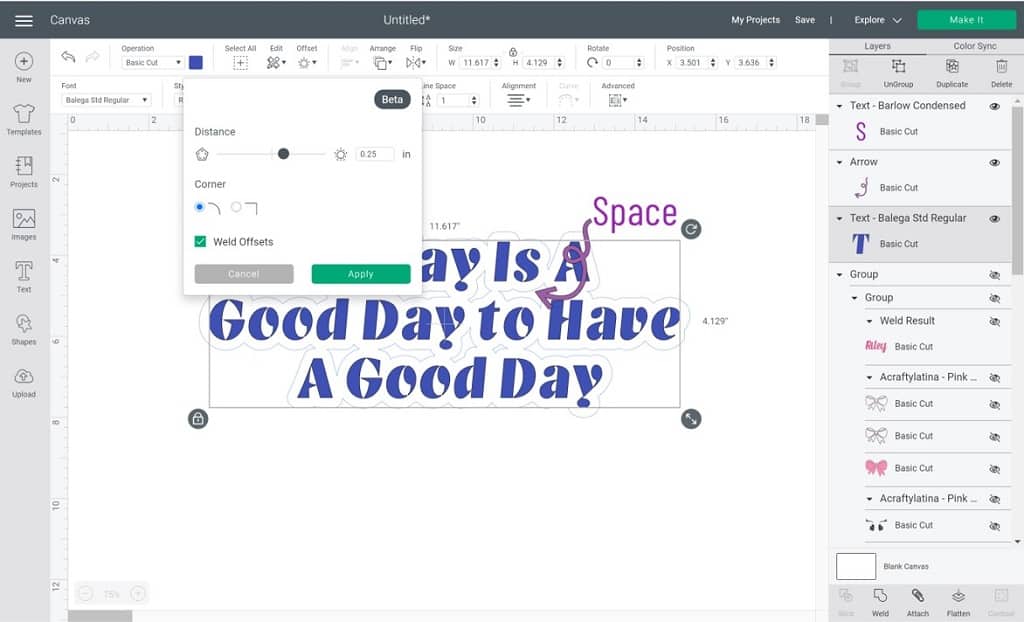
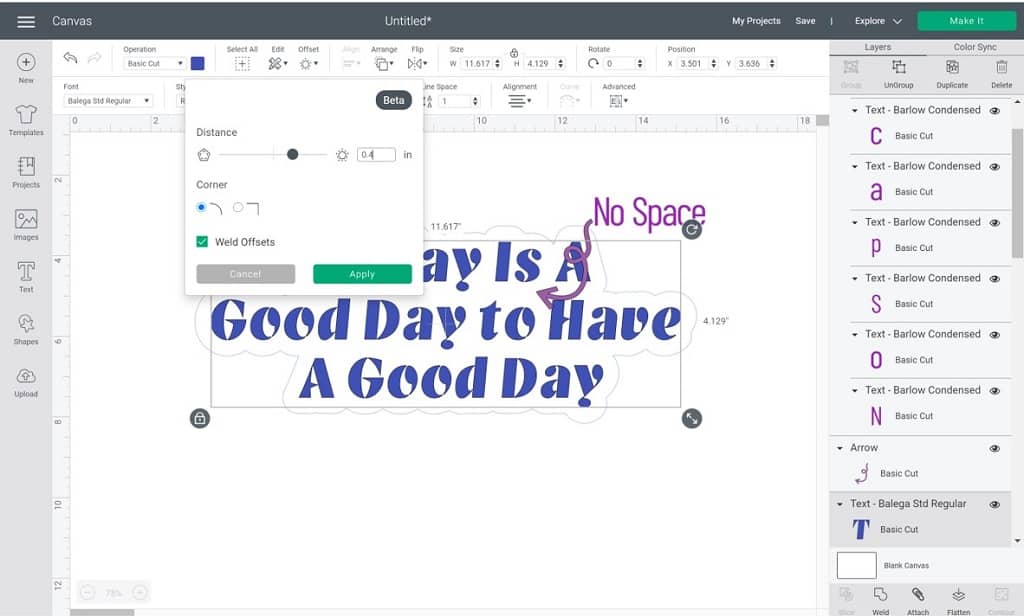
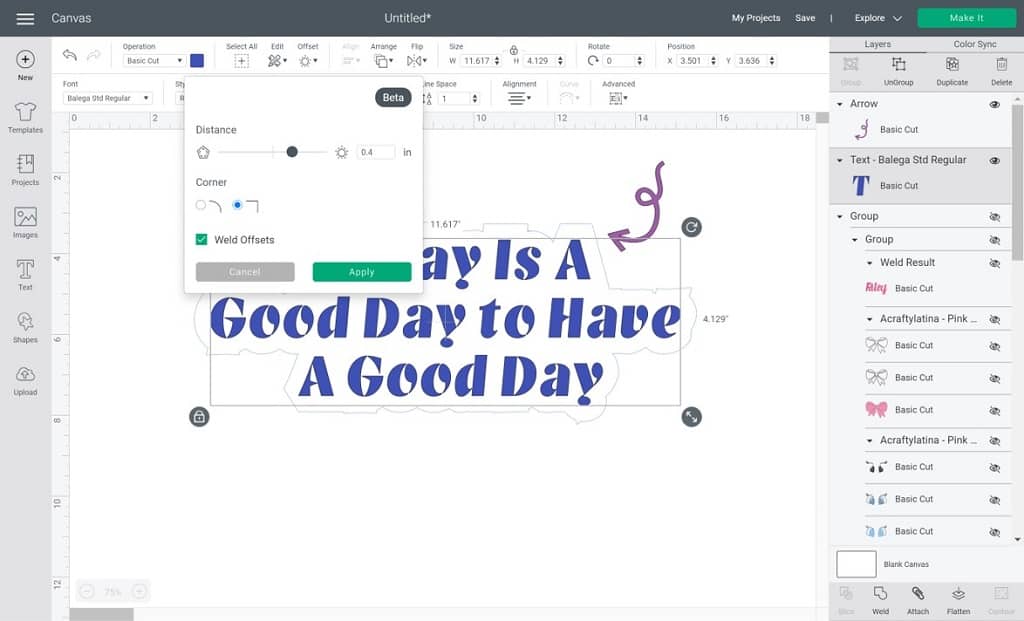
What you will also see, is if you select to square corner option it creates harsher edges around your words.
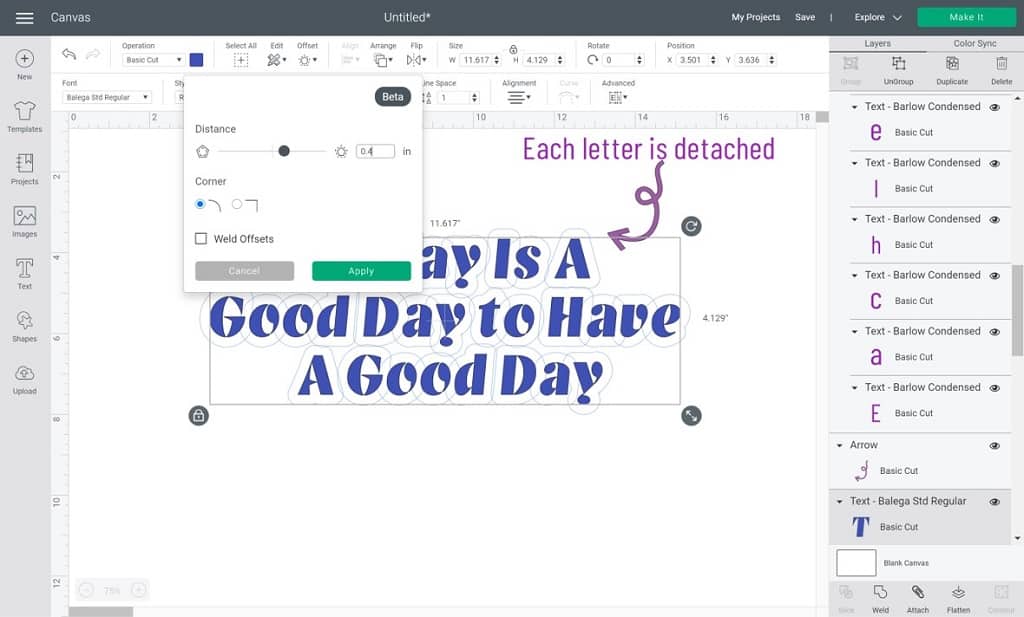
However, the most important feature for when you’re doing text, is the Weld option. If you do not click on the weld option, Cricut will create an offset layer for each individual letter and everything will cut out separately.

Once you’re happy with it, hit apply and you have your offset layer created. If you’re doing stickers then I would attach the offset to the front layer but if you’re using HTV, then just cut it out as a separate layer.
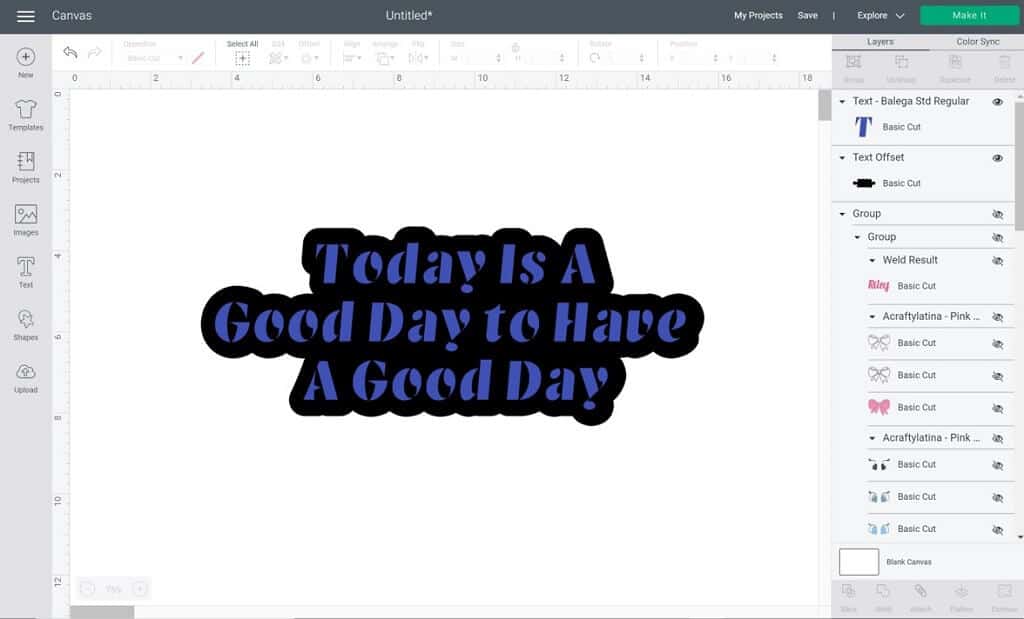
At first it may seem a little complicated to learn how to use the Cricut Offset Feature, but as you do more projects you will get the hang of it. It is truly a timesaver and we no longer have to use another program to create stickers or knockout designs.
Questions
If you are having trouble accessing the offset feature or have additional questions on how to use the Cricut offset feature, make sure to visit the FAQ page on Cricut. You can also comment on this blog and I will respond as best I can.
As always, remember to Do What You Love and Love What You Do.
Related Articles:
How To Make a Layered Monogram on Cricut
cLICK BELOW TO WATCH VIDEO

This post may contain affiliate links which may provide me with a small percentage of purchased items. This does not affect the price of your product but does allow me to continue to provide you great content and free resources.


