I always wondered how to use Cricut’s Design Space Slice Feature, now I love it because not only can I make customized designs but I can also make customized shapes. Below I show you the steps on how to do it and I’ve included a video with an additional sample.
Note: that you can only slice 2 layers at the same time, so if you have an image with multiple layers you will need to ungroup them and only work with 2 layers at a time.
So What is the Slice feature and how to you use it?
In this example I will be slicing my name out of a heart shape.
Step 1 – On the left side of your canvas click on insert shape and select the heart. Click on text and type your name
Step 2 – Click on your name and put it over the heart image so that they overlap
Step 3 – Highlight both the heart shape and your name together. On your PC or Mac you can do this by clicking on either the Shift or Ctrl key and clicking on each layer. That should bring a box around both images together.

Tip: You can also hold down your mouse key and drag it so that you highlight both images together.
Slice & Dice It
Once you’ve done that, look at the bottom right of your screen and you will see the slice feature is now highlighted. Click on it. Once it’s done you will be able to drag your name out 2x from the heart image.
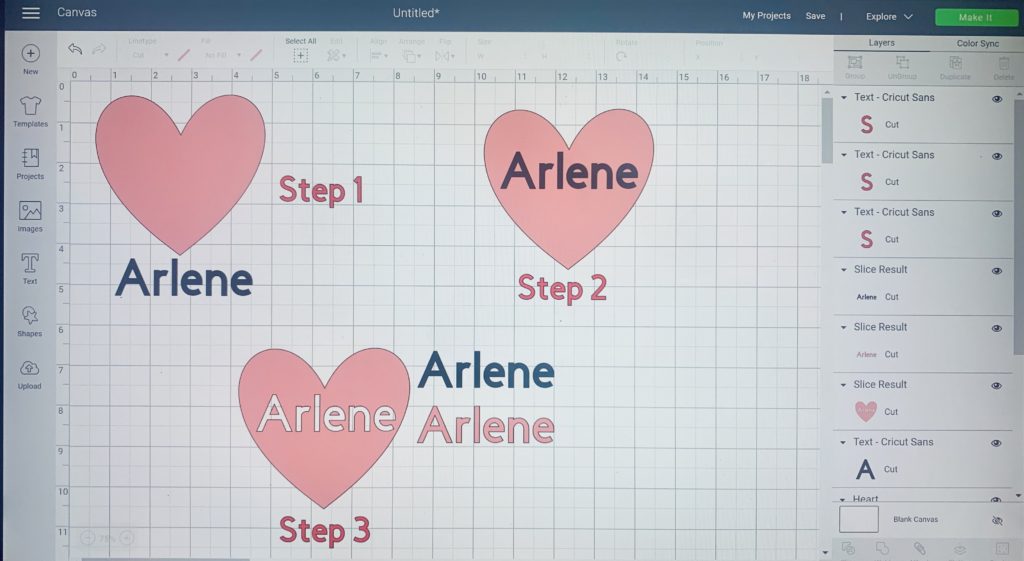
The first one is the original one you typed and the second one is the one that was sliced from the heart. You should see all 3 layers on your Layers Panel to the right. You can either delete the extra layers or hide them by clicking on the little eye located at the top of the image in the Layer’s Panel.
Tip: This is great if you are doing an HTV project on a white shirt; you don’t have to layer, just cut out the image and when you iron it on, the image/name is already white. Save time and save $$.
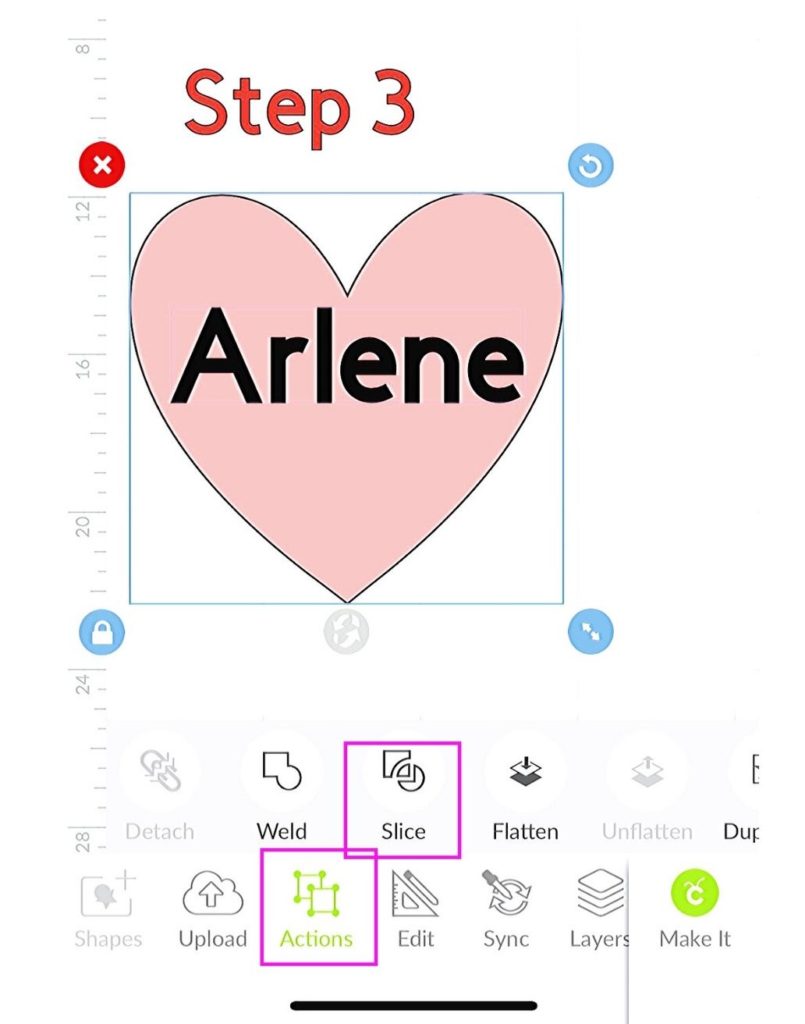
YES, the Slice feature is on your IOS/Android device as well. Once you have your images in place as described above. Select both images by tapping on the screen and dragging a selection box around both layers. Then tap on the Actions button at the bottom of the screen to see that the Slice option is available
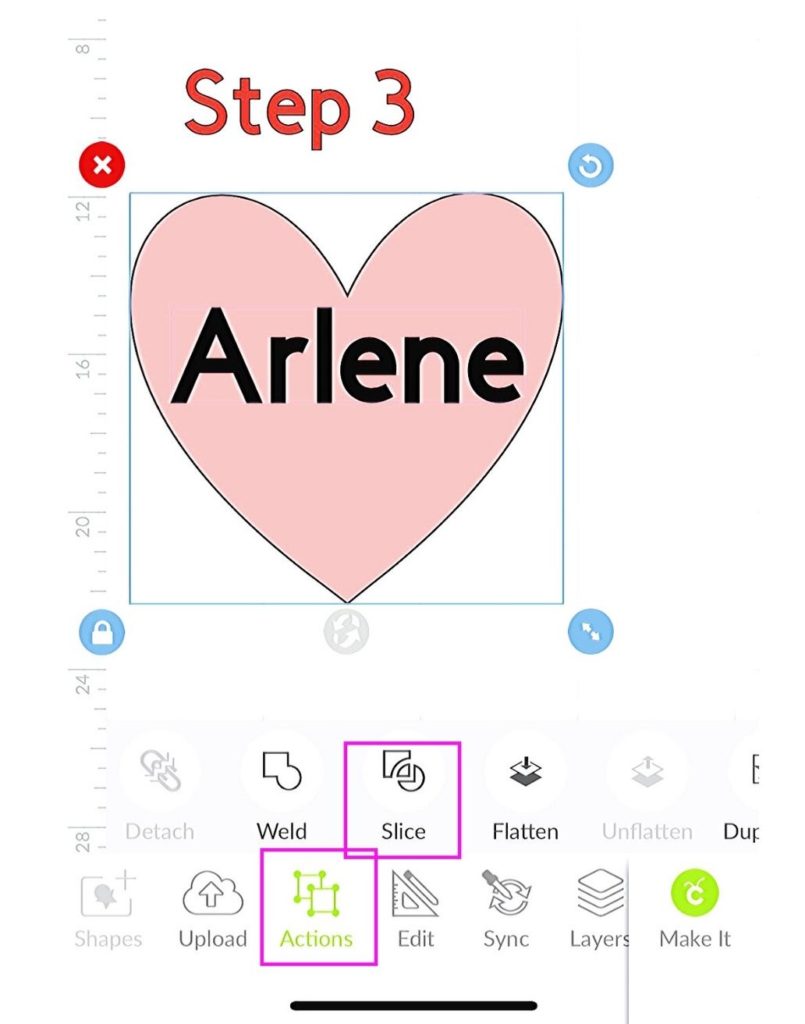
And there you have it, your heart shape should now have your name cut out.
I hope you found this useful and feel comfortable doing it. Just keep practicing with all different shapes and images. This little feature is a game changer.
TIP: You can also do this with images, watch here for a step-by-step video tutorial.
Remember to have fun and be crafty. As always, Do What You Love, Love What You Do. Feel free to comment below and ask any questions.

